The workflow section contains workflows that i have personally used to create my AI generated videos. Or at least toyed around with. You need some basic knowledge about ComfyUI and/or stable-diffusion-webui by Automatic1111. How it works, and where to put the weights, loras etc.
My current system is a Nvidia 4060 XT with 16 gb vram, 32 gb system ram, and a 5800x3d amd processor. Older workflows were made at an Nvidia 3060 with just 8 gb vram. My recommendation is to have at least 12 gb vram nowadays.
Video workflows
Wan 2.1 Image to Video
Nvidia Cosmos Image to Video
LTX Video 0.9.5 Image to Video
LTX Video Image to Video – deprecated !
CogvideoX Image to Video
Mochi Text to Video
Animatediff Simple Prompt Traveling
Animatediff3 img2vid Sparse control
Animatediff-vid2vid-Openpose
Animatediff LCM Image to Video Prompt Traveling
Ipiv Morph Img2Vid – Tomgoodnoiseversion
Deforum Settings
Image workflows
Wan 2.1 Image to Video
The zipfile contains the workflow in json and png format, plus the source image that was used to create the video. 1.91 Mb
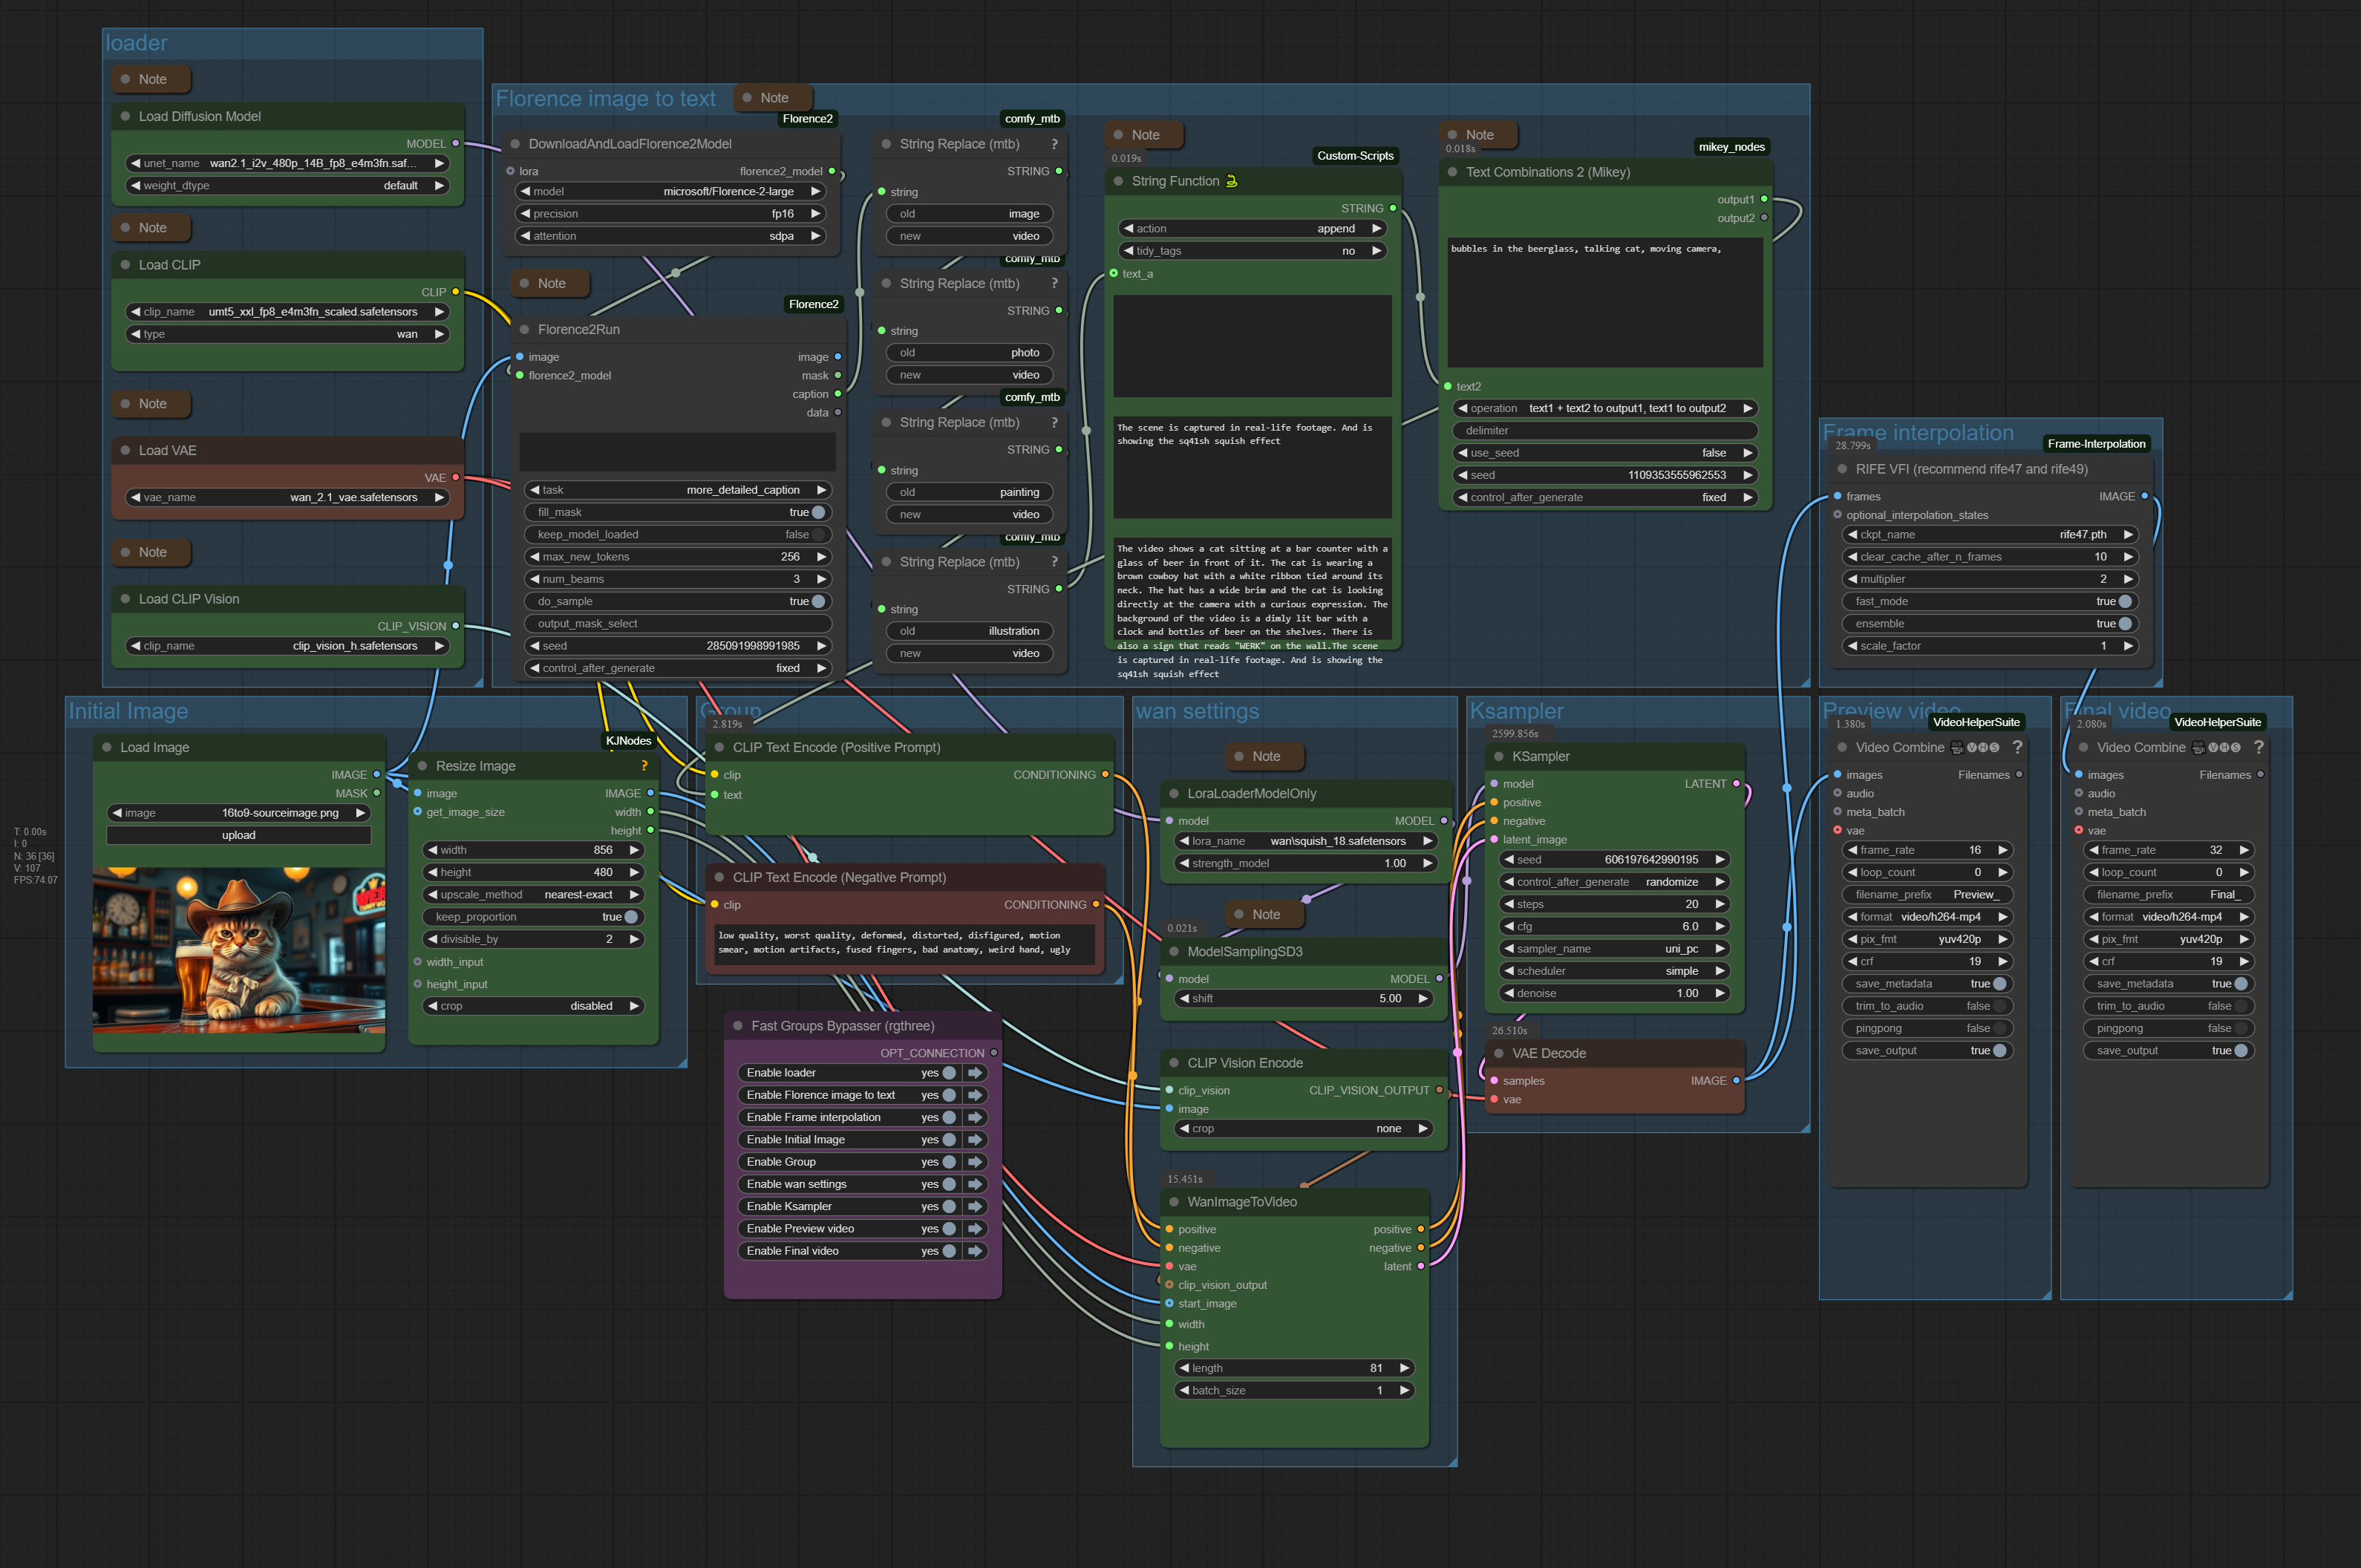
Workflow overview
Generated result
Explain Video at Youtube
Upload at 29.03.2025
Howto
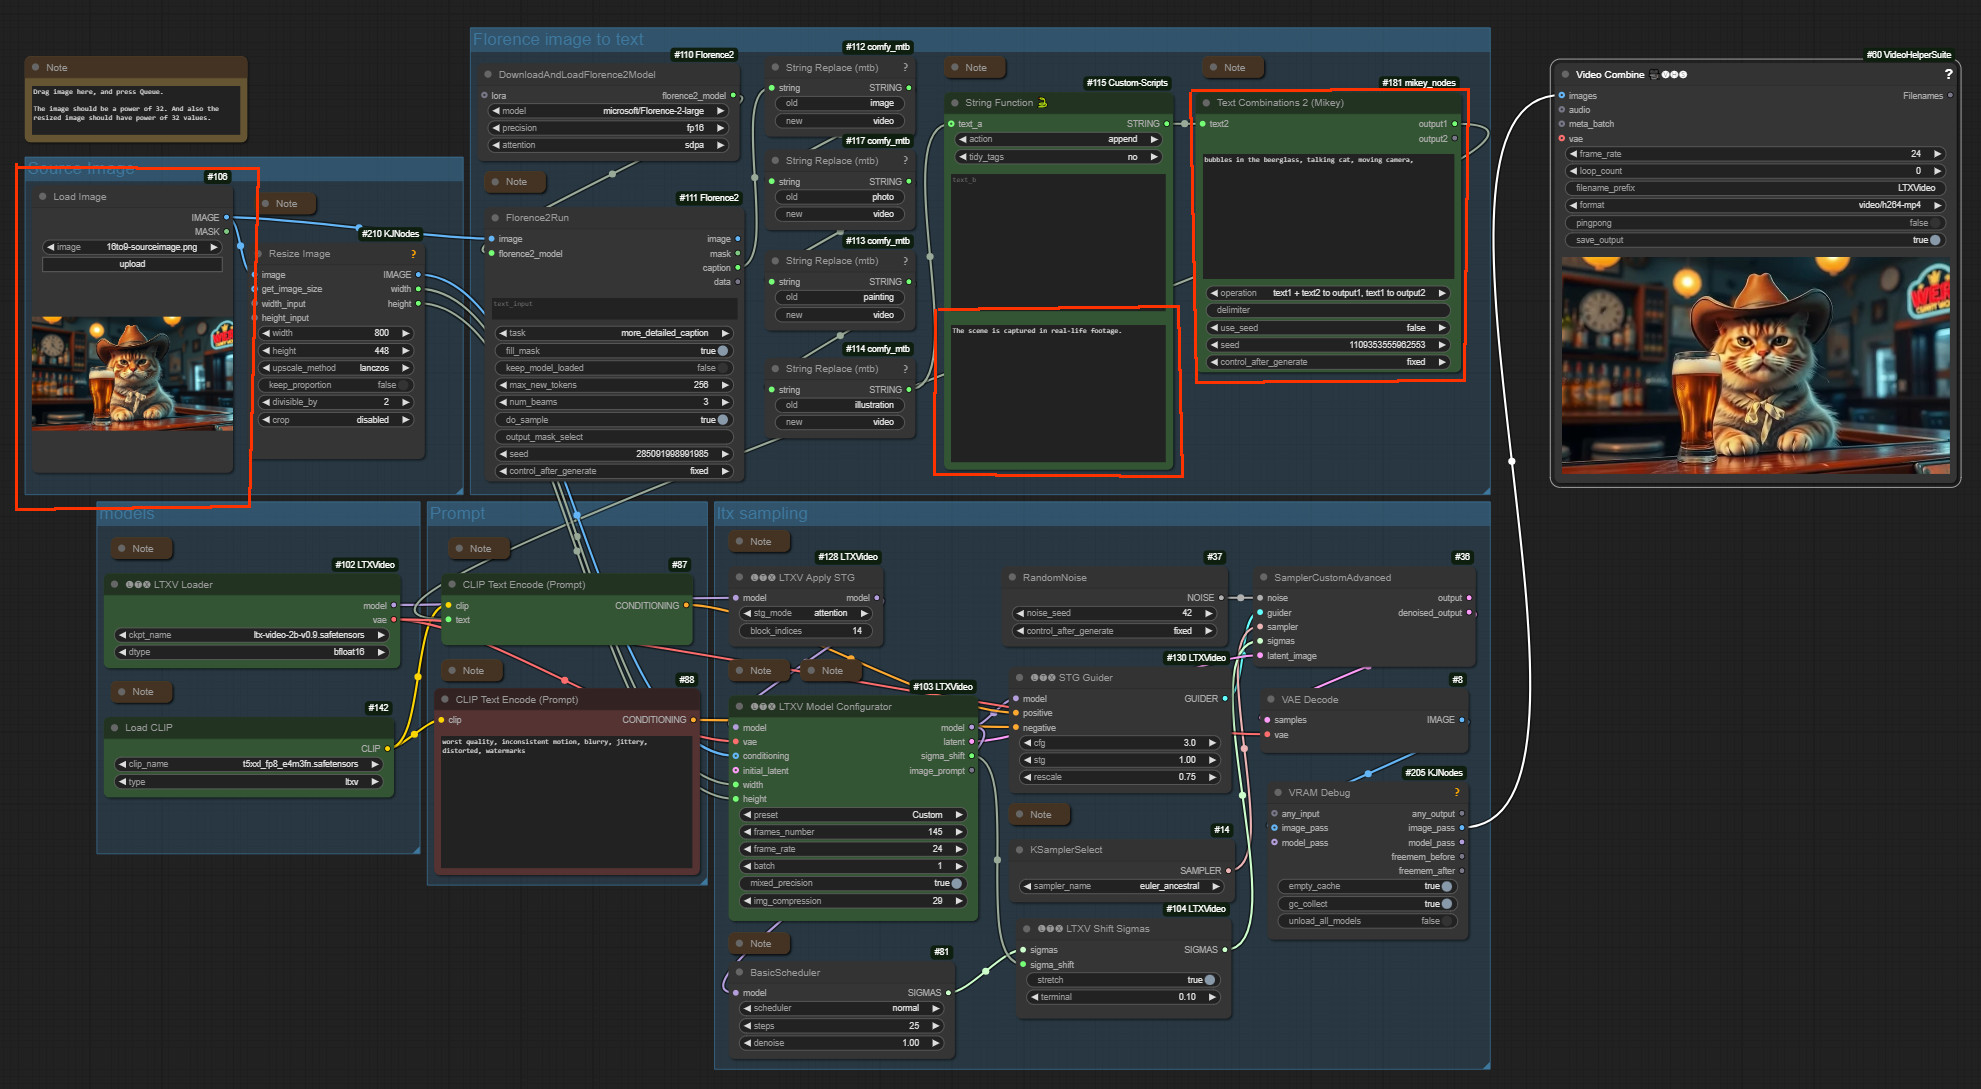
Drag an initial image into the image node, adjust the prompt, and press queue. The rest should fit.
Description
An image to video ComfyUI workflow with the video model Wan 2.1 It is based at the default workflow from the ComfyUI example page. But with some modifications. The workflow includes Florence, which analyzes the image and writes a prompt for it. It also includes a Lora.
https://comfyanonymous.github.io/ComfyUI_examples/wan/
Note that upscaling better happens in an extra step. You can find example upscaling workflows in my article about video upscaling in comfyui: https://www.tomgoodnoise.de/index.php/video-upscaling-in-comfyui/
There are some collapsed Note nodes besides the important nodes. Click at them to expand them.
The Note nodes contain further informations. And in case of the models also links to the models, and where to put them.
Time
The example video in 480p and made with the low precision fp8 version of Wan 2.1 rendered in slow 45 minutes plus some overhead for preparation. Wan video is slow.
Requirements
This workflow was generated with 16 gb vram. Minimum requirement is 12 gb vram. And you should not have fewer than 32 gb system ram.
Nvidia Cosmos Image to Video
The zipfile contains the workflow in json and png format, plus the source image that was used to create the video. 1.39 Mb
Workflow overview

Generated result
Explain Video at Youtube
Upload at 09.02.2025
Howto
Drag an initial image into the image node, adjust the prompt, and press queue. See red marked nodes. The rest should fit.
Description
An image to video ComfyUI workflow with Nvidia Cosmos. It is based at the default workflow from the ComfyUI example page. But with some modifications.
https://comfyanonymous.github.io/ComfyUI_examples/cosmos/
Note that upscaling should happen in an extra step. If even. Cosmos generates already pretty big videos. With a minimum size of 704 x 704. You can find example upscaling workflows in my article about video upscaling in comfyui: https://www.tomgoodnoise.de/index.php/video-upscaling-in-comfyui/
The minimum size is 704 x 704 pixels, as mentioned.
There are some collapsed Note nodes besides the important nodes. Click at them to expand them.
The Note nodes contain further informations. And in case of the models also links to the models, and where to put them.
Time
The example video rendered in very slow 52 minutes plus some overhead for preparation. Cosmos video is slow.
Requirements
This workflow was generated with 16 gb vram. Minimum requirement is 12 gb vram. And you should not have fewer than 32 gb system ram.
LTX Video 0.9.5 Image to Video
The zipfile contains the workflow in json and png format, plus the source image that was used to create the video. 2.59 Mb
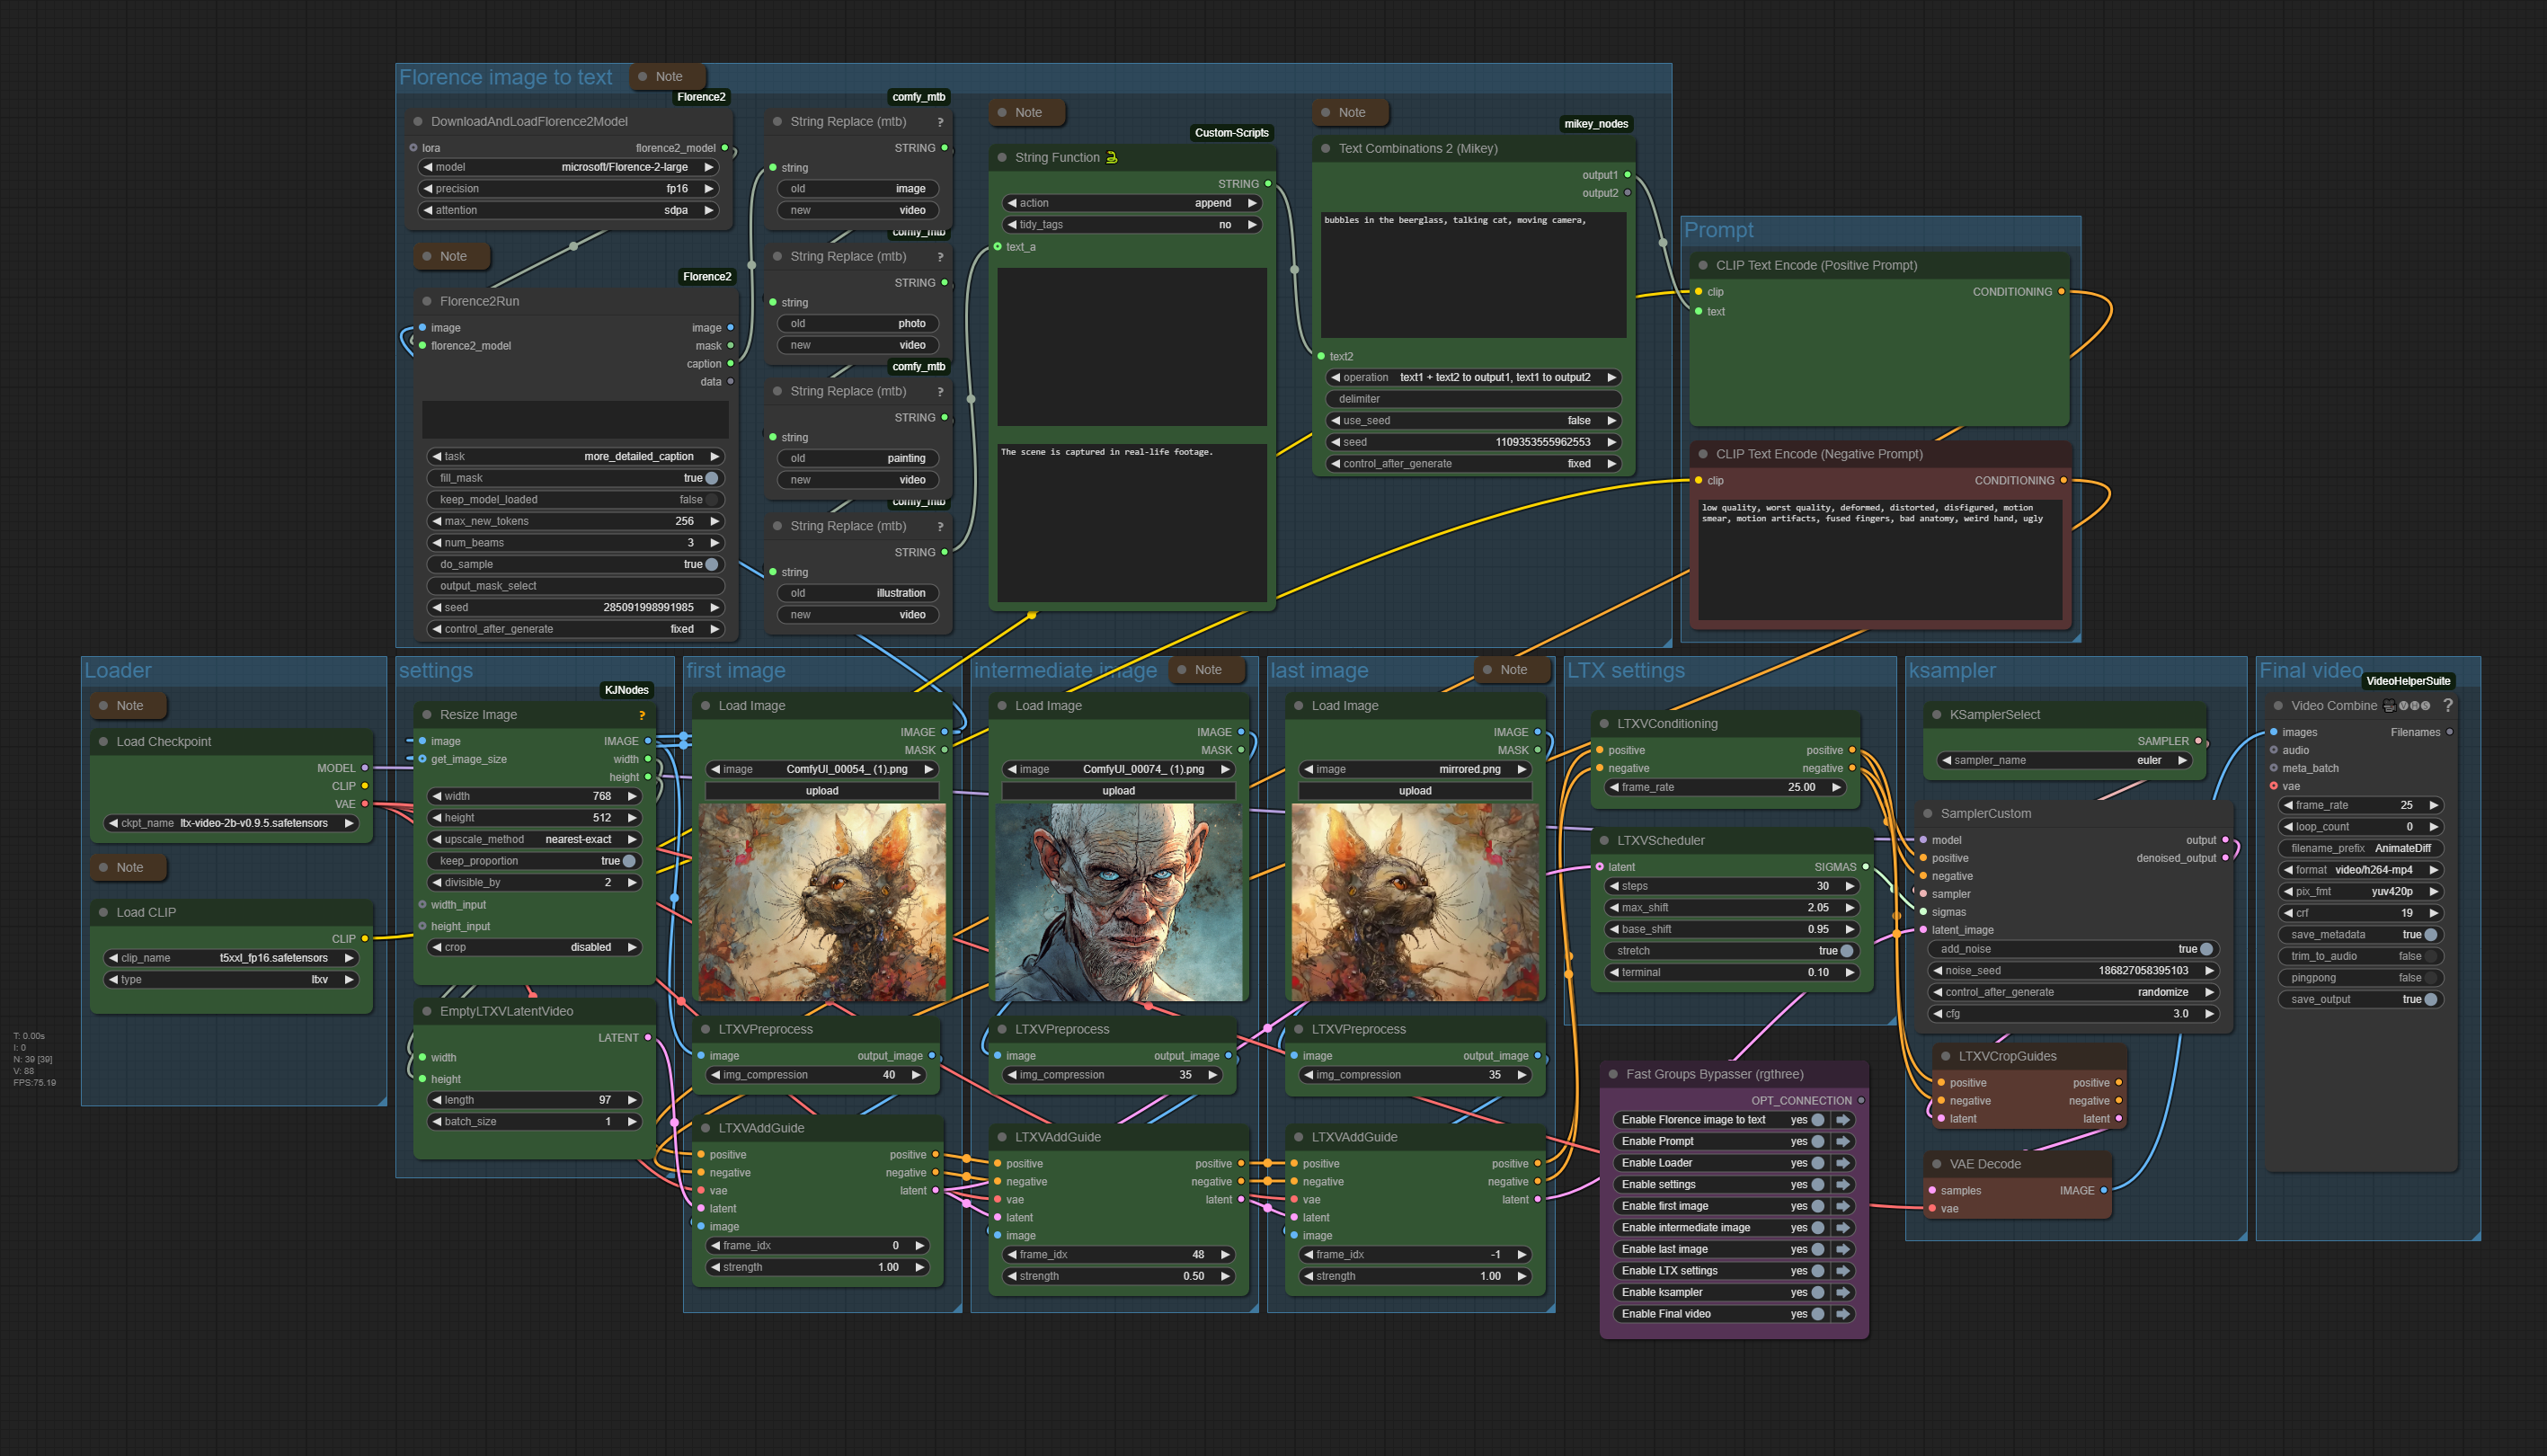
Workflow overview
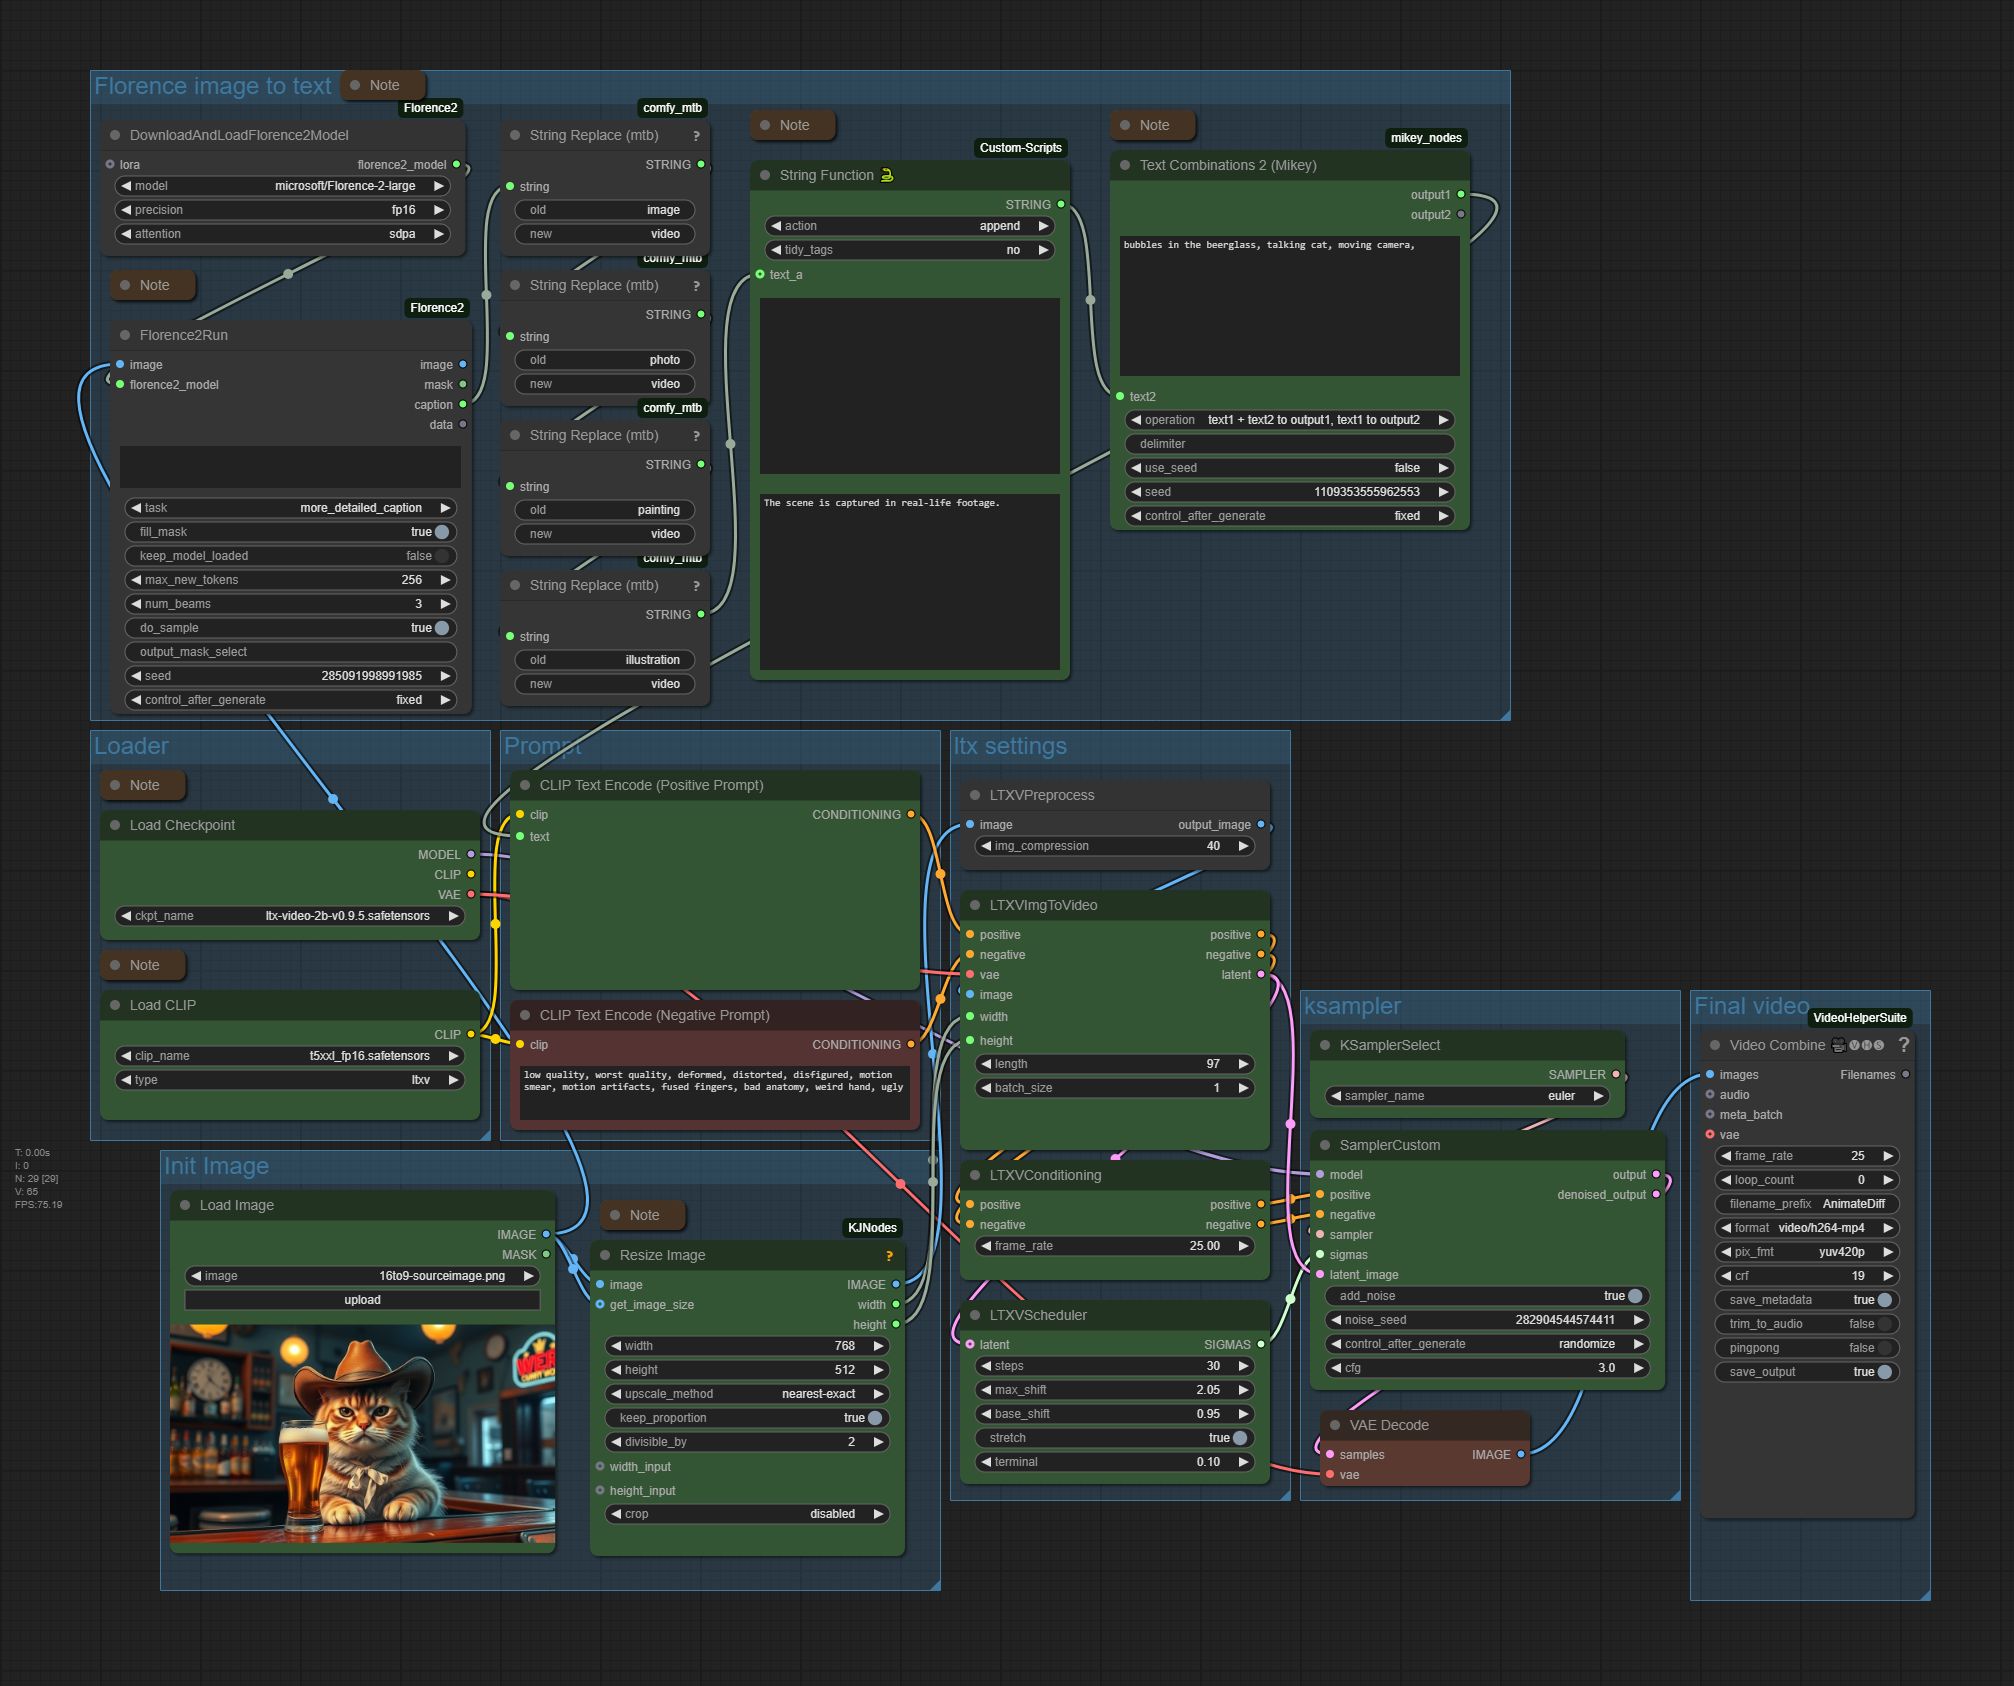
Workflow overview
Generated result
Generated result
Explain Video at Youtube
Upload at 21.03.2025
Howto
Drag an image into the image nodes, adjust the prompt, and press queue. The rest should fit.
Description
An image to video ComfyUI workflow with LTX Video. Better said, two of it. A simple one, with just an initial image. And a workflow with an initial image, an intermediate image, and an end image.
Upscaling better happens in an extra step. You can find example upscaling workflows in my article about video upscaling in comfyui: https://www.tomgoodnoise.de/index.php/video-upscaling-in-comfyui/
Creation size can be freely chosen, as long as it is a power of 32. And i think it has a minimum size. But you want to render as big as possible anyways.
There are some collapsed Note nodes besides the important nodes. Click at them to expand them.
The Note nodes contain further informations. And in case of the models also links to the models, and where to put them.
Time
The example video rendered in amazingly 1:30 to 2 minutes in the simple workflow. Plus some overhead for preparation. The more complex workflow takes a bit longer. But not this much longer. LTX video is fast.
Requirements
This workflow was generated with 16 gb vram. Minimum requirement is 12 gb vram. And you should not have fewer than 32 gb system ram.
LTX Video Image to Video
This workflow is deprecated. And the download link is removed. The update of LTX Video to version 0.95 has removed three nodes from the workflow, and they are not longer available. And so the workflow is simply not longer functional.
The description will stay available though since there is a youtube video connected with it. Please use the newer workflow above.
Workflow overview
Generated result
Explain Video at Youtube
Upload at 21.01.2025
Howto
Drag an initial image into the image node, adjust the prompt, and press queue. See red marked nodes. The rest should fit.
Description
An image to video ComfyUI workflow with LTX Video. It is basically the same workflow that you can find in the LTX custom node, but a bit rearranged and two little changes. So when you found the original workflow and you are happy with it, then there is no big need to download this workflow.
Note that i was not able to implement an upscaling into this workflow. I ran permanently into an OOM. So upscaling better happens in an extra step. You can find example upscaling workflows in my article about video upscaling in comfyui: https://www.tomgoodnoise.de/index.php/video-upscaling-in-comfyui/
Creation size can be freely chosen, as long as it is a power of 32. And i think it has a minimum size. But you want to render as big as possible anyways.
There are some collapsed Note nodes besides the important nodes. Click at them to expand them.
The Note nodes contain further informations. And in case of the models also links to the models, and where to put them.
Time
The example video rendered in amazingly 1:30 minutes plus some overhead for preparation. LTX video is fast.
Requirements
This workflow was generated with 16 gb vram. Minimum requirement is 12 gb vram. And you should not have fewer than 32 gb system ram.
CogvideoX Image to Video
The zipfile contains the workflow in json and png format, plus the source image that was used to create the video. 959 kb
Workflow overview
Generated result
Explain Video at Youtube
Upload at 03.01.2025
Howto
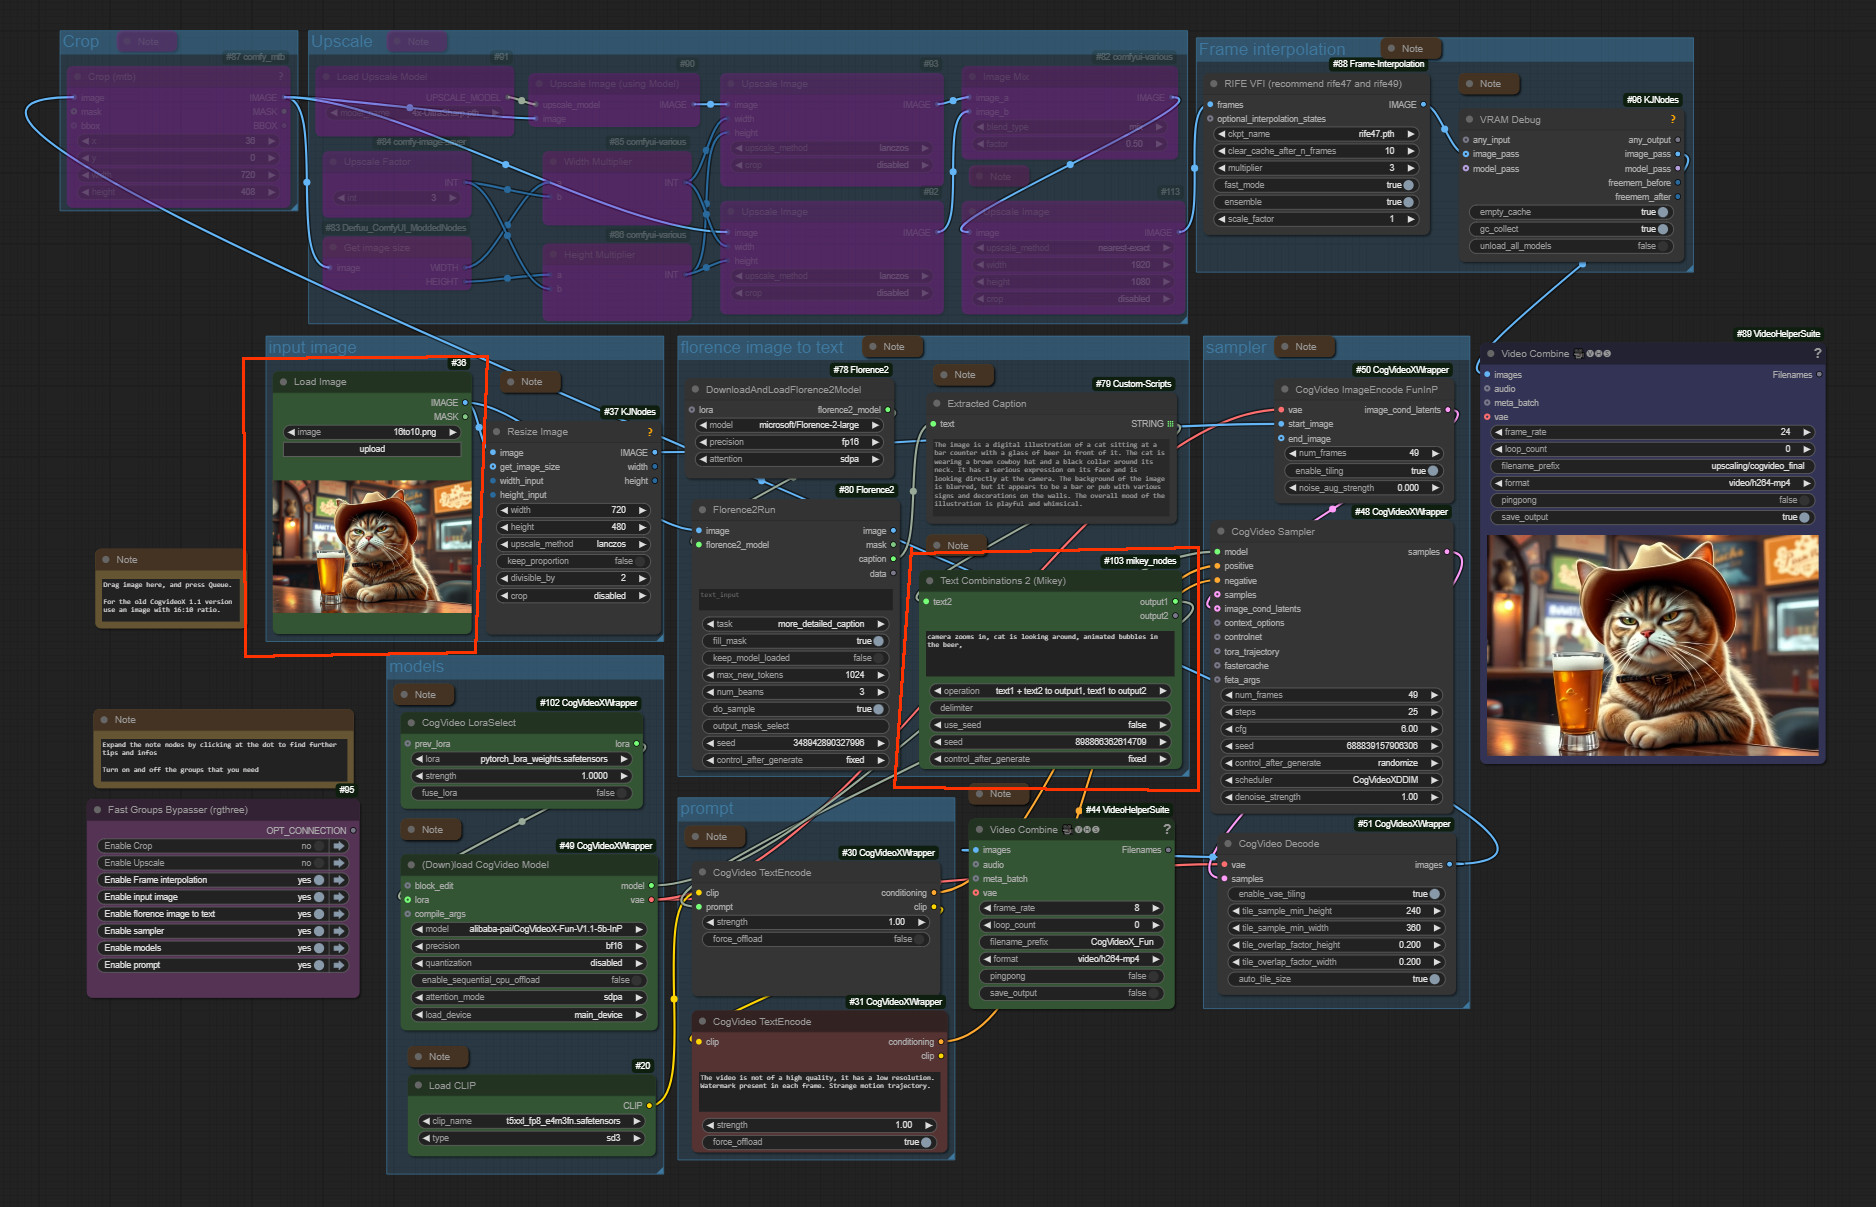
Drag an initial image into the image node, adjust the prompt, and press queue. See red marked nodes. The rest should fit.
Description
An image to video ComfyUI workflow with CogVideoX. Tested with CogvideoX Fun 1.1 and 1.5. Note that the motion lora does not work with the Fun 1.5 model. Just with the 1.1 one.
This workflow also contains a CogVideoX motion lora for the camera movement. And you can also add further instructions in the prompt. CogVideoX relies at motion informations in text form.
It also has a very simple upscaling method implemented. I am at my journey to figure out a special upscaling workflow though. But for some it might still be useful. It is super fast compared to an upsampling by another ksampler.
CogVideo creation size is limited. The old version 1.1 is fixed to a 16:10 format. And 720×480 resolution. The new version 1.5 goes up to double size, but the motion lora that i use here does not work with it.
There are some collapsed Note nodes besides the important nodes. Click at them to expand them.
The Note nodes contain further informations. And in case of the models also links to the models, and where to put them.
Time
The example video rendered in 8 minutes plus some overhead for preparation, without the upscaling with CogvideoX Fun version 1.1. at an 4060 TI. Version 1.5 renders doube as fast. But the motion lora does not work. Upscaling is another 4 minutes then.
Requirements
This workflow was generated with 16 gb vram. Minimum requirement is 12 gb vram. You might get it to work with low vram settings. But i could not get CogVideoX to work with my old 3060 TI with just 8 gb vram.
Mochi Text to Video
The zipfile contains a workflow for the video AI Mochi 1 Preview. plus the source image that was used to create the video. 1.29 Mb
Workflow overview V2 and V3
Generated result
Explain Video at Youtube coming soon
Upload at 06.04.2025
Howto
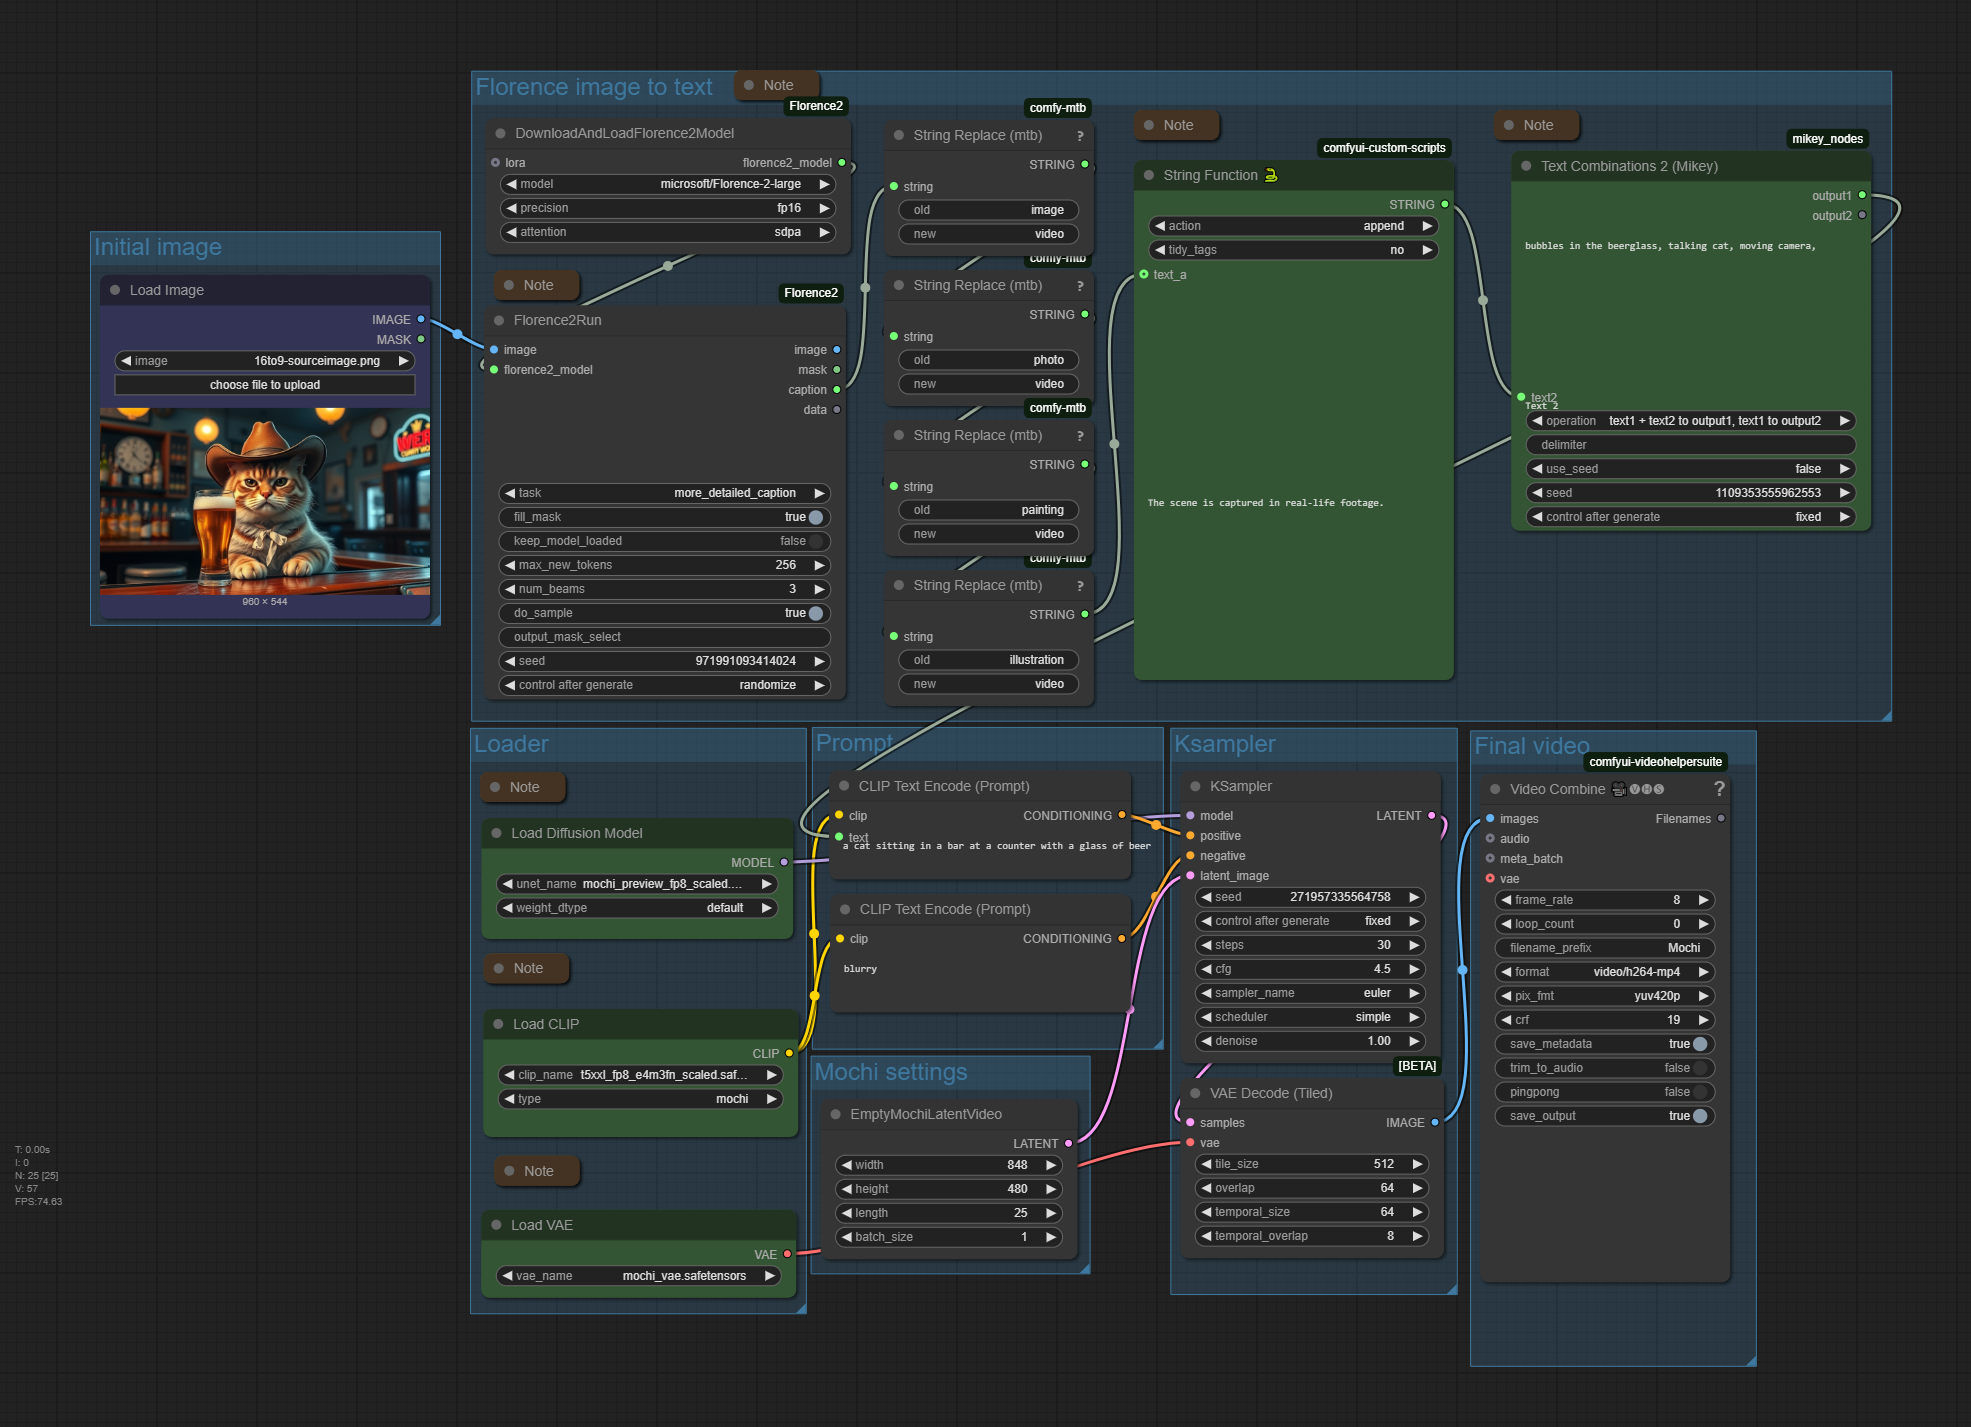
Drom image, adjust prompt. Generate.
Description
Mochi Preview 1 is an open source video ai model. It does not allow to have image to video in this free version. Mochi itself has turned into an online video AI service. And the newest version is not public available like the preview version. So the so called open source model that you can download at huggingface is more a demo nowadays.
I have added a florence2 node group to the original workflow to have an easier way to “write” the prompt.
Back in the days when this model was released as open source it was an improvement over AnimateDiff. But after testing the model i do not recommend to use it. There are better free models around nowadays. And it should be clear that the open source version of Mochi will not receive any updates anymore.
In case you nevertheless do, i recommend to upscale and do the frame interpolation in an extra workflow. Mochi is not really ram friendly. See this article here:
Video upscaling in ComfyUI
Time
The example with a length of three seconds and a resolution of 848x 480 needed around nine minutes at an 4060 TI with 16 gb vram.
Requirements
I have 16 gb vram and 32 gb system ram available. And ran into an OOM with the 16p version. The 8p version worked, but made still trouble at the vae decode with running out of ram. So i would say you really need 16 gb vram for this model as a minimum. And 32 gb system ram.
Animatediff Simple Prompt Traveling
The zipfile contains a workflow for AnimateDiff 2 and 3, and one workflow for AnimateLCM, which is based at AnimateDiff 2
Workflow overview V2 and V3
LCM
Generated result
Explain Video at Youtube
Upload at 25.02.2025
Howto
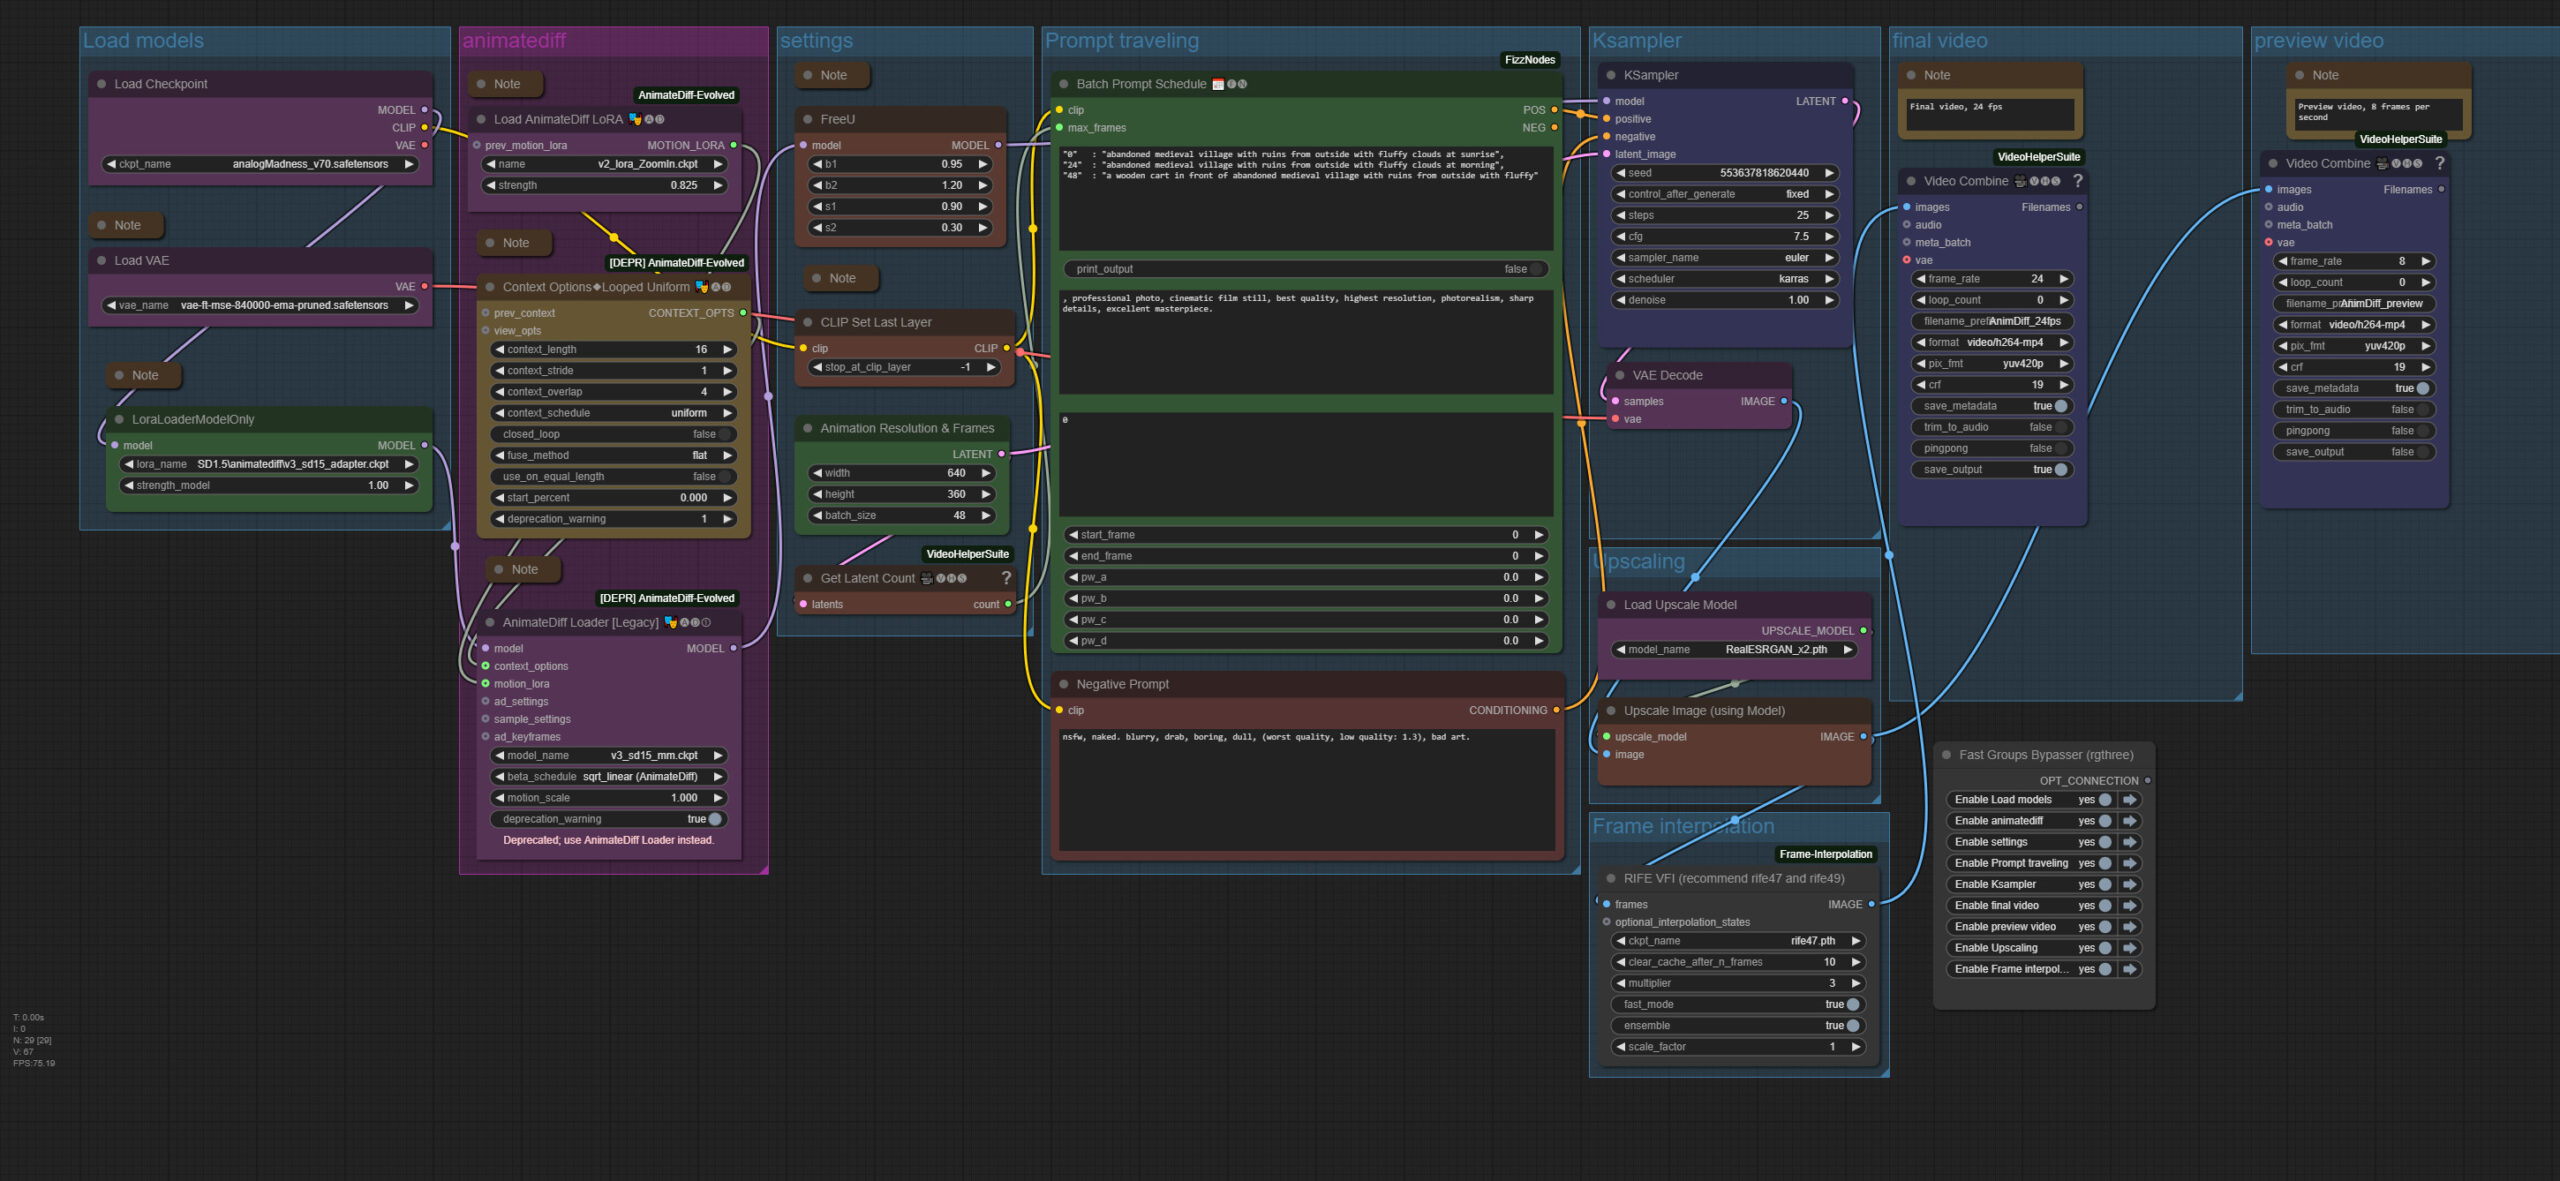
Adjust prompt. Generate.
Description
AnimateDiff was one of the first Video AI solutions for offline needs. And this is the most basic workflow for it. The base for other AnimateDiff workflows.
This workflow here is about prompt traveling with AnimateDiff. You choose different prompts for different keyframes. And in the video the prompts morphs into each other.
There are two workflows available. One for AnimateDiff 2 and 3. And one for the AnimateLCM, which is based at AnimateDiff 2.
AnimateDiff and Stable Diffusion 1.5, which are used in conjunction, are trained at 512 pixels in size. So you better won’t go this much higher in creation size. The result will become inconsistent. What you can try is to upscale afterwards.
Both workflows comes with upscaling. But i recommend to upscale in an extra workflow. By a second Ksampler. See this article here:
Video upscaling in ComfyUI
Time
The example with a length of six seconds and a resolution of 1280 x 720 (simple upscaling with AI) finished in two and a half minutes at an 4060 TI with 16 gb vram. It does not use the best upscaling method though.
Requirements
These workflows were generated with 8 gb vram back in the days. However, i ran too often into an OOM. And when you want to do a proper upscaling then i highly suggest a card with at least 12 gb vram.
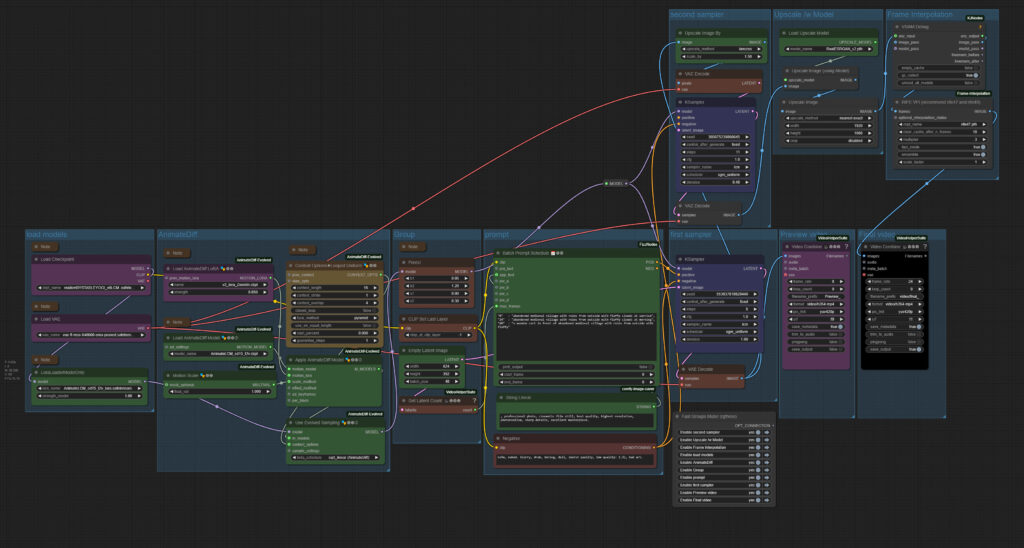
Animatediff3 img2vid Sparse Control
The zipfile contains an Image to Video workflow with AnimateDiff3 and sparse control, plus the Supermegabadassupscaler from Banodoco – 2.23 Mb
Workflow overview
Generated result
Explain Video at Youtube
Upload at 07.03.2025
Howto
Load a start and end image. Adjust prompt, size and length. Produce a preview video. Upscale this preview video in the Supermegabadassupscaler workflow to the final result and frame rate.
Description
This is an Animatediff 3 workflow with a start and an end image. This is done across Sparse Control. And this workflow is made of two steps. First you create a preview video with 8 frames per seconds and in the usual fitting size for Animatediff. And then you upscale it with the Supermegabadassupscaler workflow.
The result is of course not as good as from the newer AI video models. And you now need to do some further work in your video editing software. But for Animatediff it is nevertheless impressing.
Time
The preview video in the length of 4 seconds and a size of 560 x 320 took around two minutes. And upscaling then took another two and a half minutes to a size of 1120 x 640.
Requirements
The workflows requires at least 12 gb vram. It uses the UltimateUpscale SD node, which simply runs out of memory most of the times with a card with just 8 gb vram. I was never able to use it with my old card.
Animatediff vid2vid Openpose
The zipfile contains a Video to Video workflow with AnimateDiff3 and OpenPose Controlnet – 2.29 Mb
Workflow overview
Input video
Generated result
Explain Video at Youtube
Upload at 02.03.2025
Howto
Load input video. Adjust prompt, size and length. Then Generate.
Description
This workflow here is about a Video to Video prompt traveling workflow across Open Pose to extract the human motion from an input video. So it has a very special purpose. And it works with AnimateDiff 3. You choose different prompts for different keyframes. And in the video the prompts morphs into each other.
AnimateDiff and Stable Diffusion 1.5, which are used in conjunction, are trained at 512 pixels in size. So you better won’t go this much higher in creation size. The result will become inconsistent. What you can try is to upscale afterwards.
The workflows comes with upscaling. But i recommend to upscale in an extra workflow. By a second Ksampler. That’s why this workflow includes the supermegabadassupscaler. See this article here:
Video upscaling in ComfyUI
Time
The example with a length of six seconds and a resolution of 640×480 finished in around 25 minutes at an 4060 TI with 16 gb vram. The relative long generation time comes from the second ksampler in the chain, which you can leave away. But it adds some quality. Higher upscaling will increase the time even more. So this workflow is not the fastest.
Requirements
These workflows were generated with 8 gb vram back in the days. However, i ran too often into an OOM. I highly suggest a card with at least 12 gb vram.
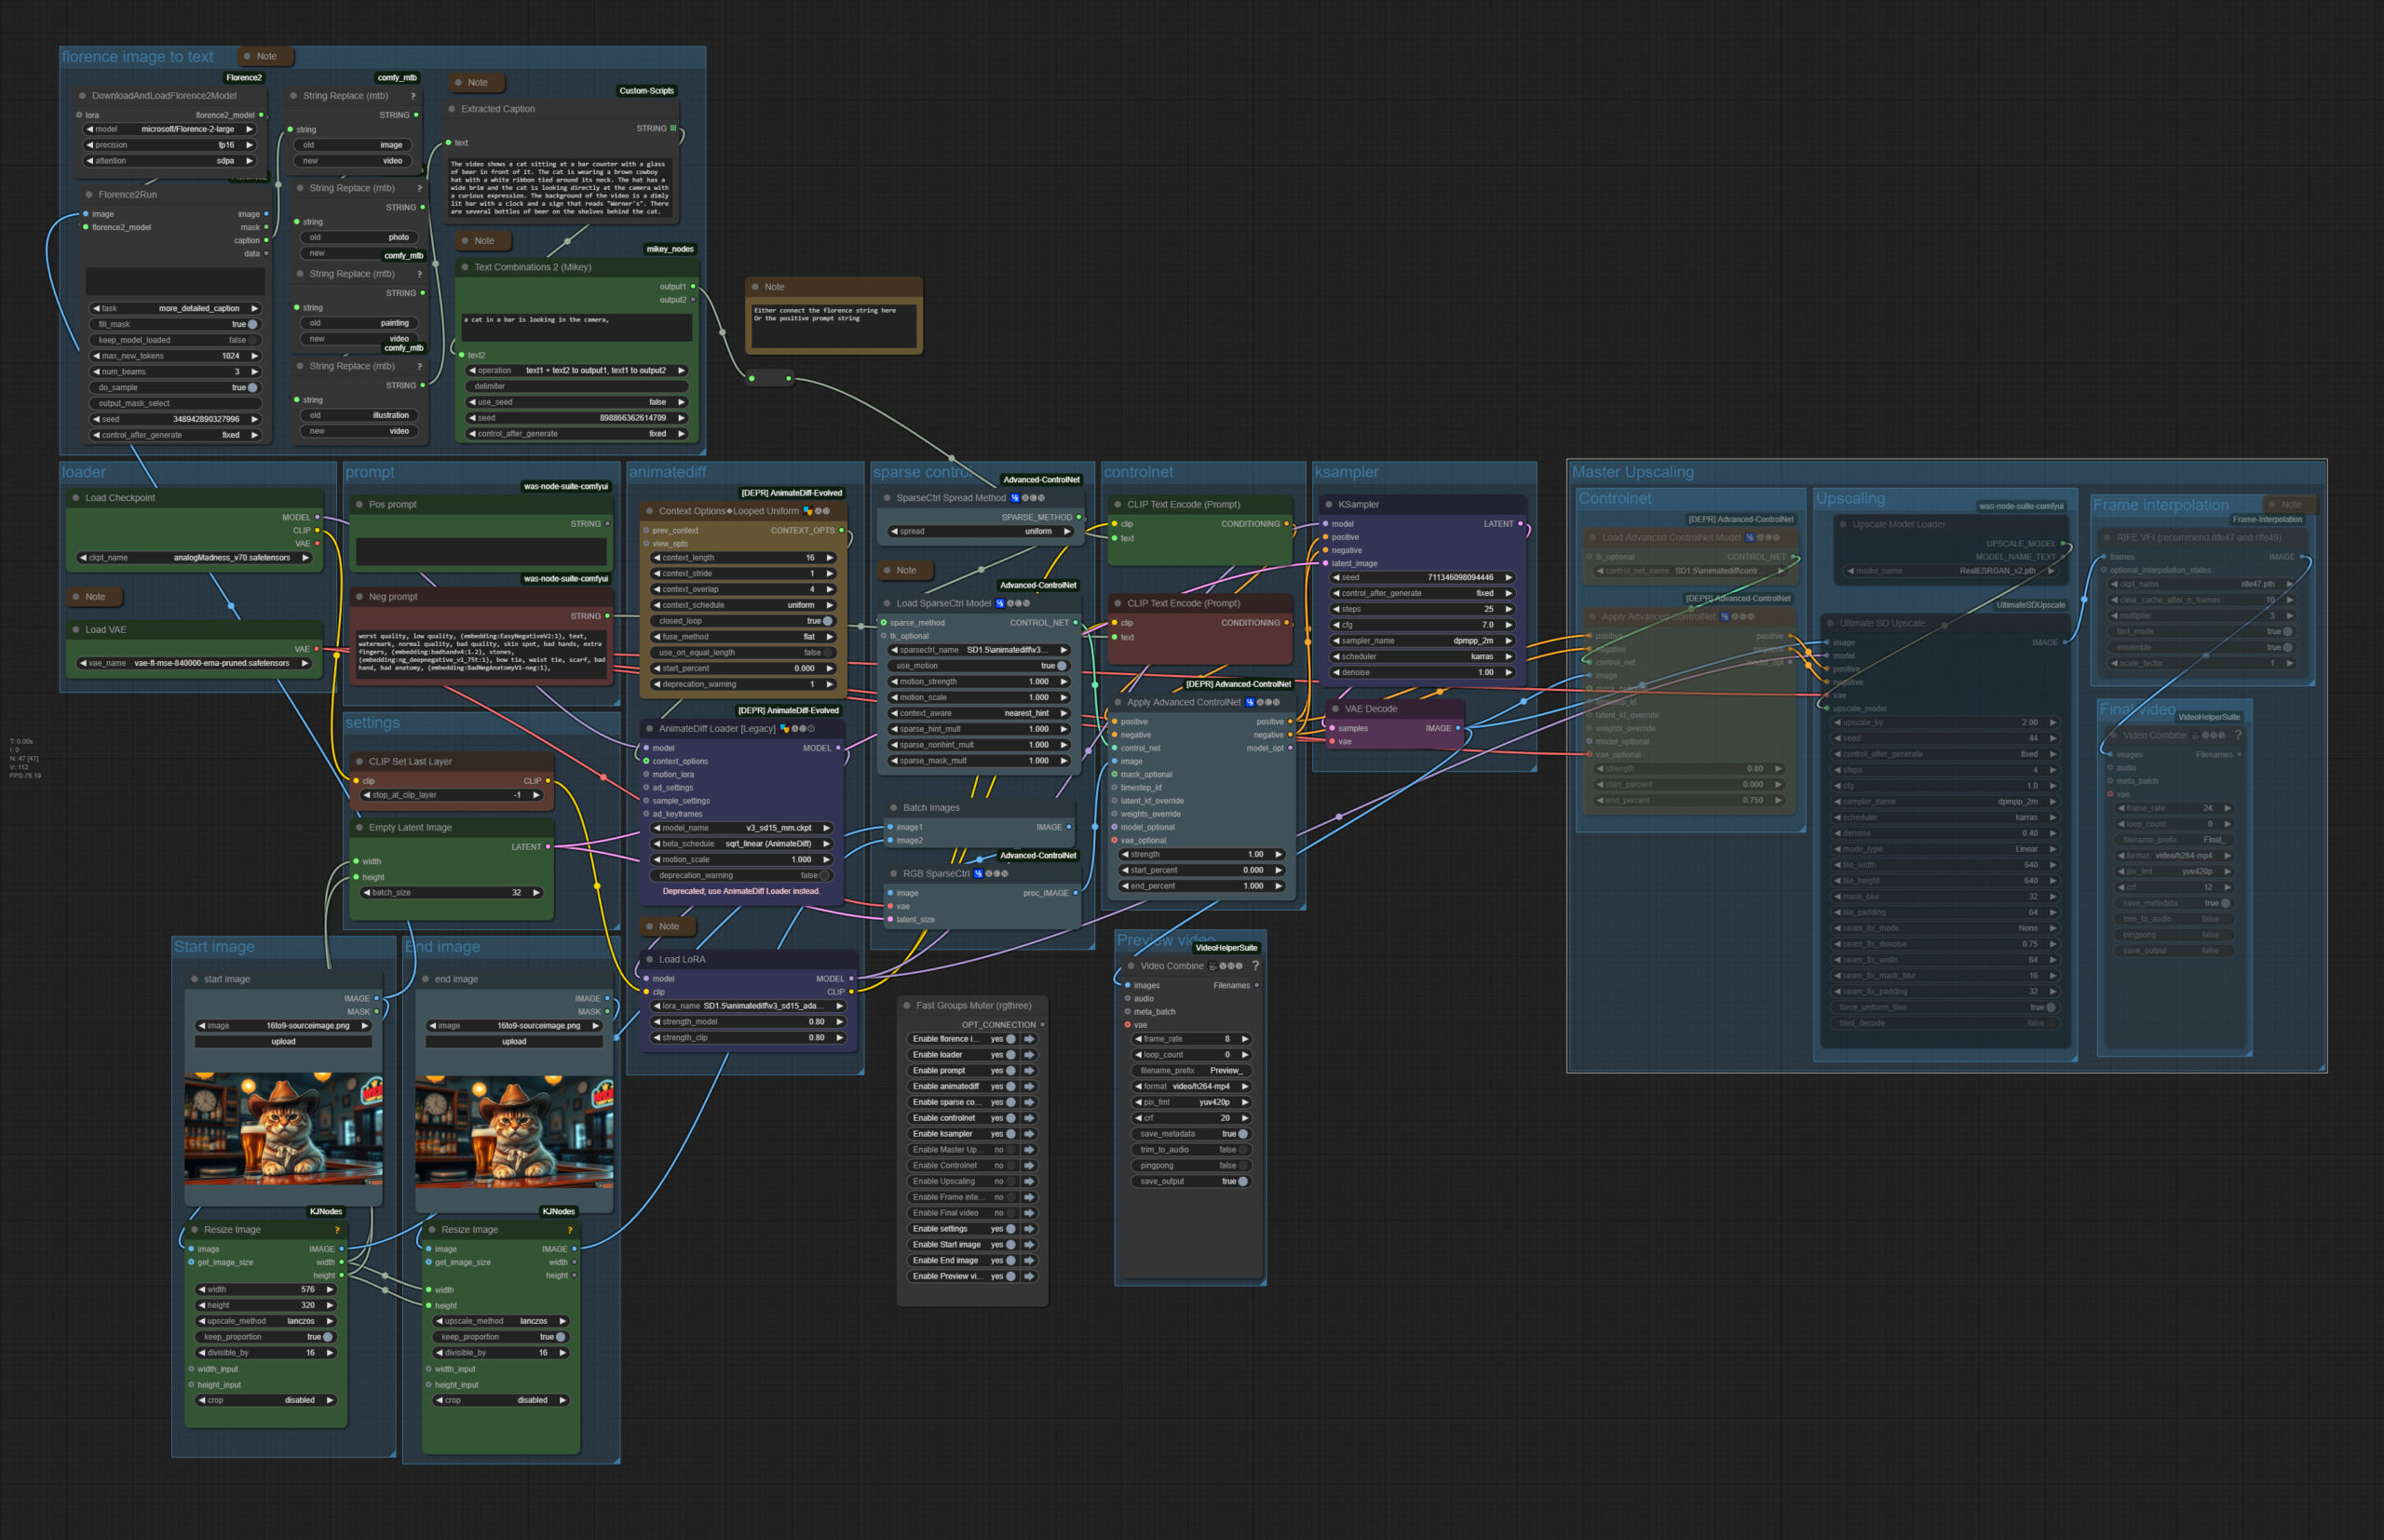
Animatediff LCM Image to Video Prompt Traveling
The zipfile contains the Animatediff LCM Image to Video Prompt Traveling workflow and the supermegabadassupscaler workflow – 2.04 Mb
Workflow overview
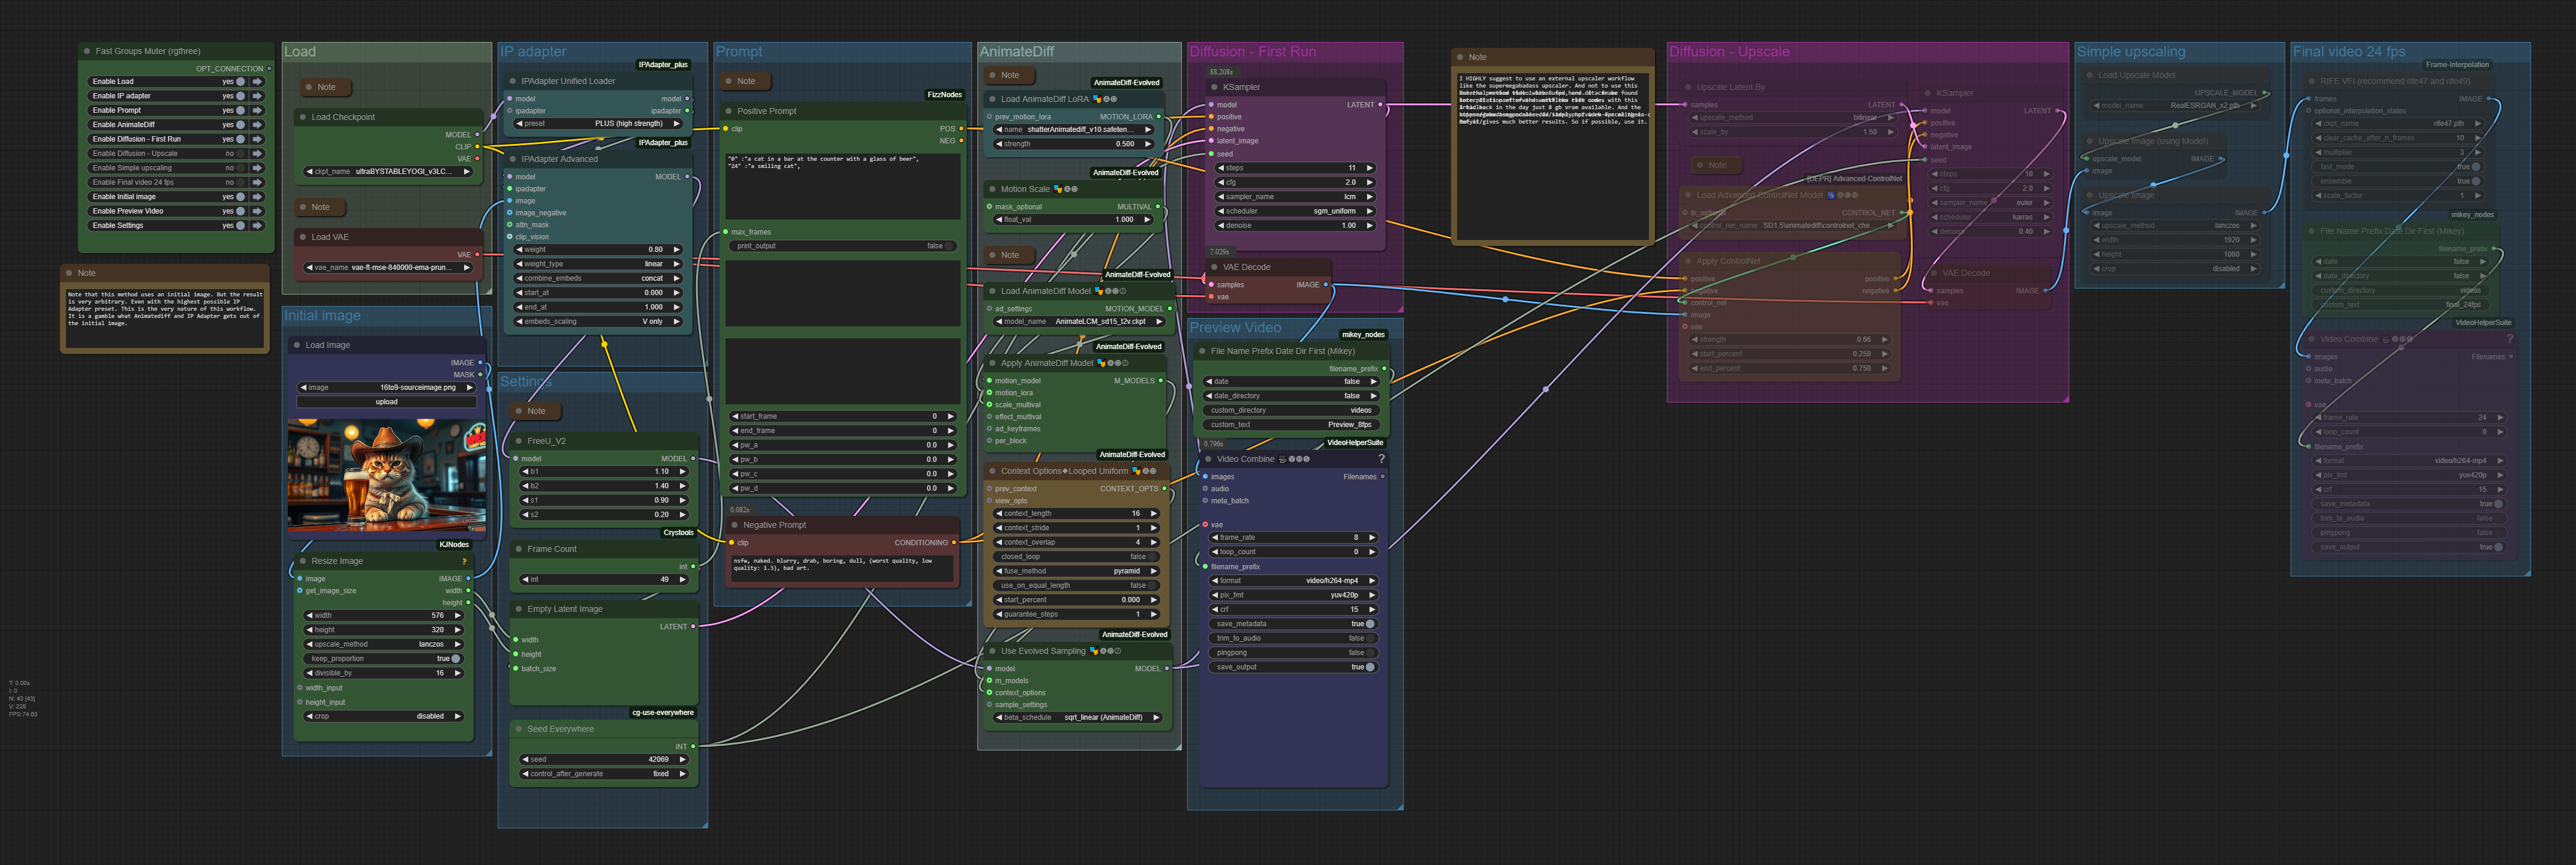
Init image
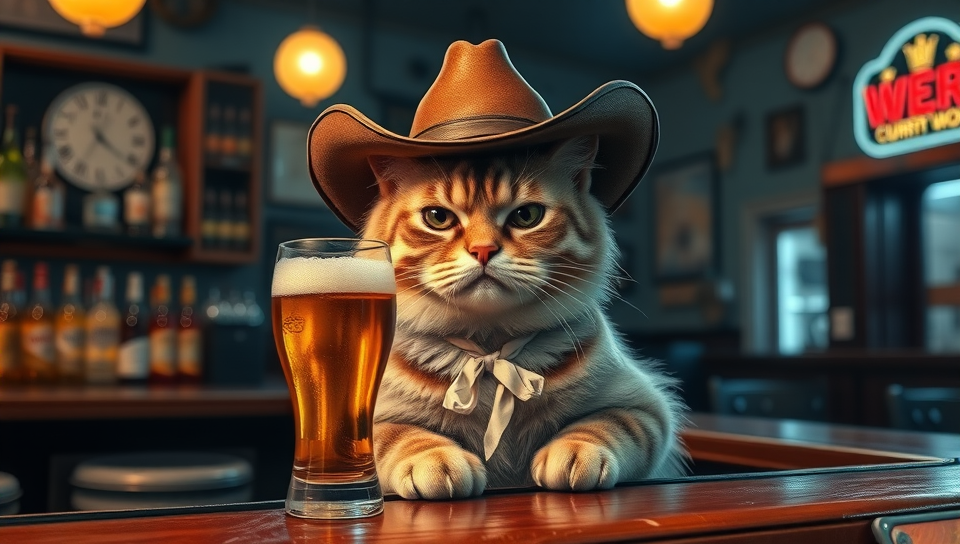
Preview video
Final video
Upload at 02.03.2025
Howto
Load initial image. Adjust prompt, size and length. Then Generate.
Description
This workflow is an image to video workflow. It is no exact method though. Even with the hightest preset in the IP Adpater the resulted video will never fit the initial image. It covers the style and idea though. When you feed in a cat and a bar, then you will get a cat and a bar in most cases. In the example video Animatediff made two cats out of it, and removed the beer …
The Animatediff version used here is Animatediff LCM.
AnimateDiff and Stable Diffusion 1.5, which are used in conjunction, are trained at 512 pixels in size. So you better won’t go this much higher in creation size. The result will become inconsistent. In the example video we get two cats because of this problem. The output video was 688×384 pixels for demonstration purpose. You want to stay smaller.
The workflows comes with upscaling. But i recommend to upscale in an extra workflow. By a second Ksampler. See this article here:
Video upscaling in ComfyUI
Time
The example with a length of six seconds and a resolution of 688×384 finished in around 1:39 minutes at an 4060 TI with 16 gb vram. Upscaling was another three minutes then.
Requirements
These workflows were generated with 8 gb vram back in the days. However, i ran too often into an OOM. I highly suggest a card with at least 12 gb vram.
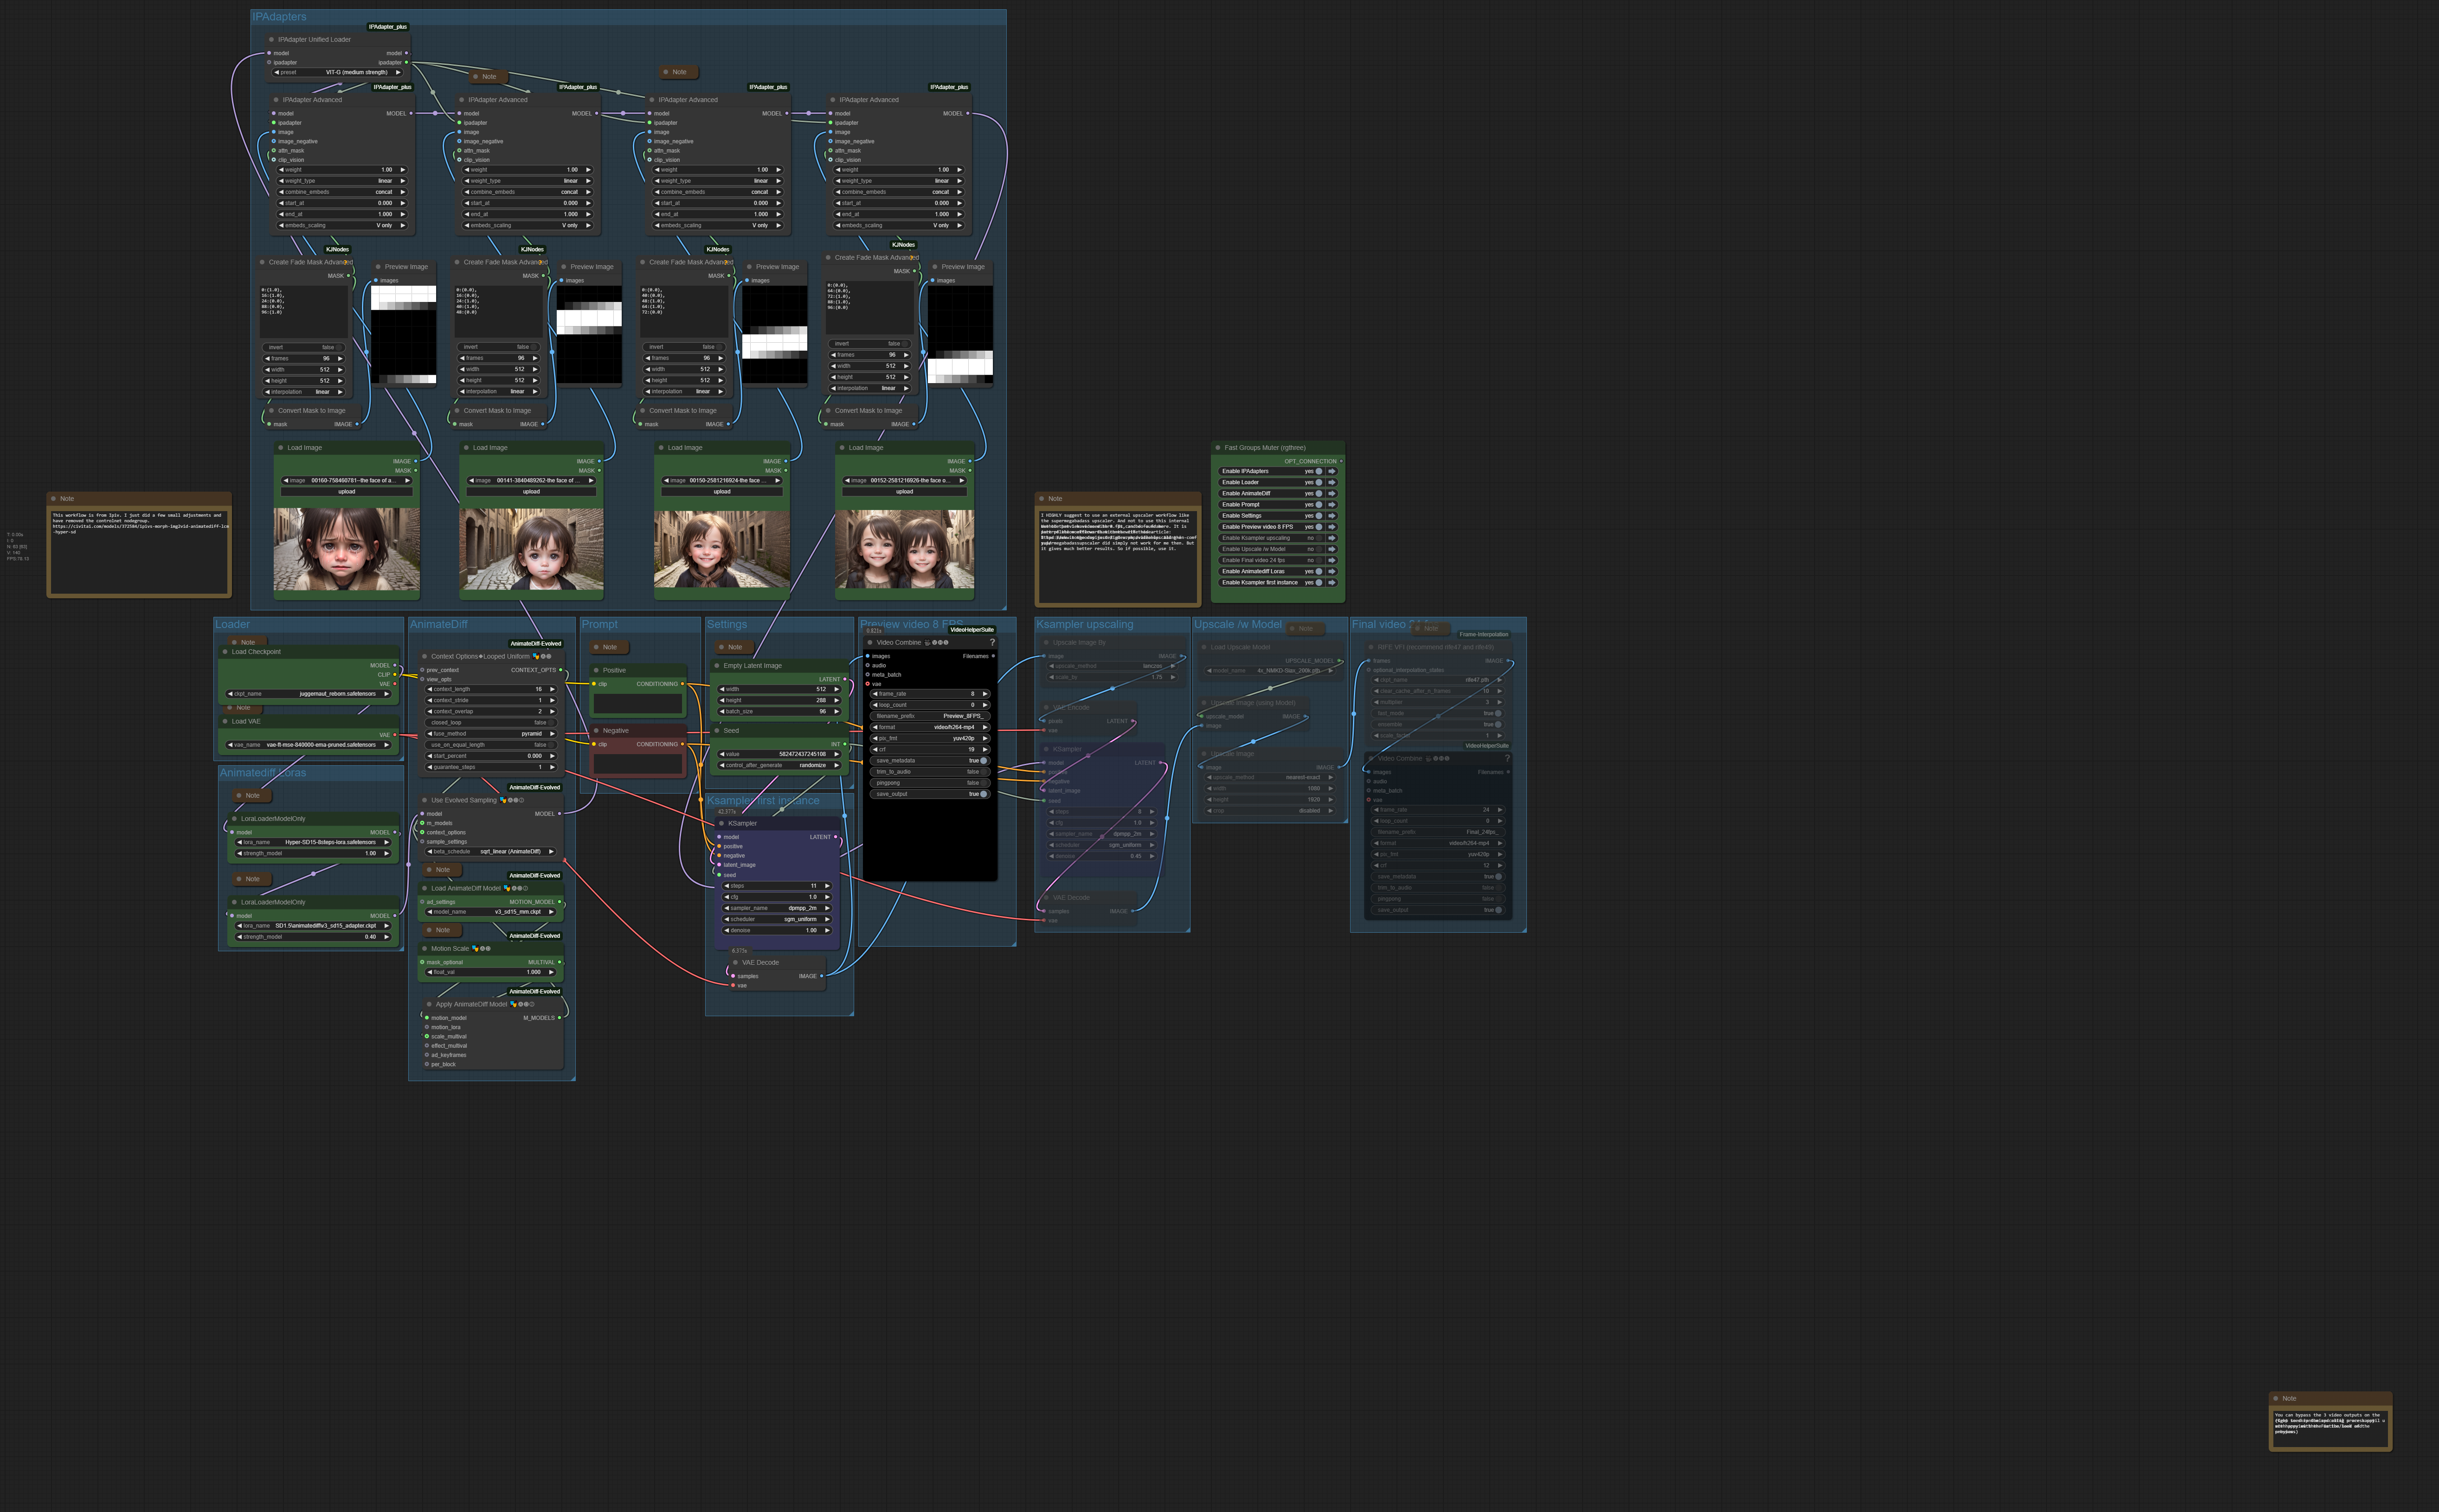
Ipiv Morph Img2Vid – Tomgoodnoiseversion
The zipfile contains the Ipiv Morph Img2Vid – Tomgoodnoiseversion workflow and the supermegabadassupscaler workflow – 5 Mb
Workflow overview
Preview video
Final video
Upload at 02.03.2025
Howto
Load initial images. Then Generate.
Source
I did not invent this workflow. It is a variation of the ipiv’s Morph – img2vid AnimateDiff LCM / Hyper-SD workflow. I have just done a few small modifications for my needs. For example, i have thrown out the controlnet instance.
https://civitai.com/models/372584/ipivs-morph-img2vid-animatediff-lcm-hyper-sd
Description
This workflow is an image to video workflow with four initial images that morphs into each other. It is no exact method though. Even with the hightest preset in the IP Adpater the resulted video will never fit the initial image. It covers the style and idea though. When you feed in a cat and a bar, then you will get a cat and a bar in most cases. In the example video Animatediff made two cats out of it, and removed the beer …
The Animatediff version used here is Animatediff 3.
AnimateDiff and Stable Diffusion 1.5, which are used in conjunction, are trained at 512 pixels in size. So you better won’t go this much higher in creation size. The result will become inconsistent. In the example video we get two cats because of this problem. The output video was 688×384 pixels for demonstration purpose. You want to stay smaller.
The workflows comes with upscaling. But i recommend to upscale in an extra workflow. By a second Ksampler. See this article here:
Video upscaling in ComfyUI
Time
The example with a length of six seconds and a resolution of 512×288 finished in around one minutes at an 4060 TI with 16 gb vram. Upscaling was another three minutes then.
Requirements
These workflows were generated with 8 gb vram back in the days. However, i ran too often into an OOM. I highly suggest a card with at least 12 gb vram.
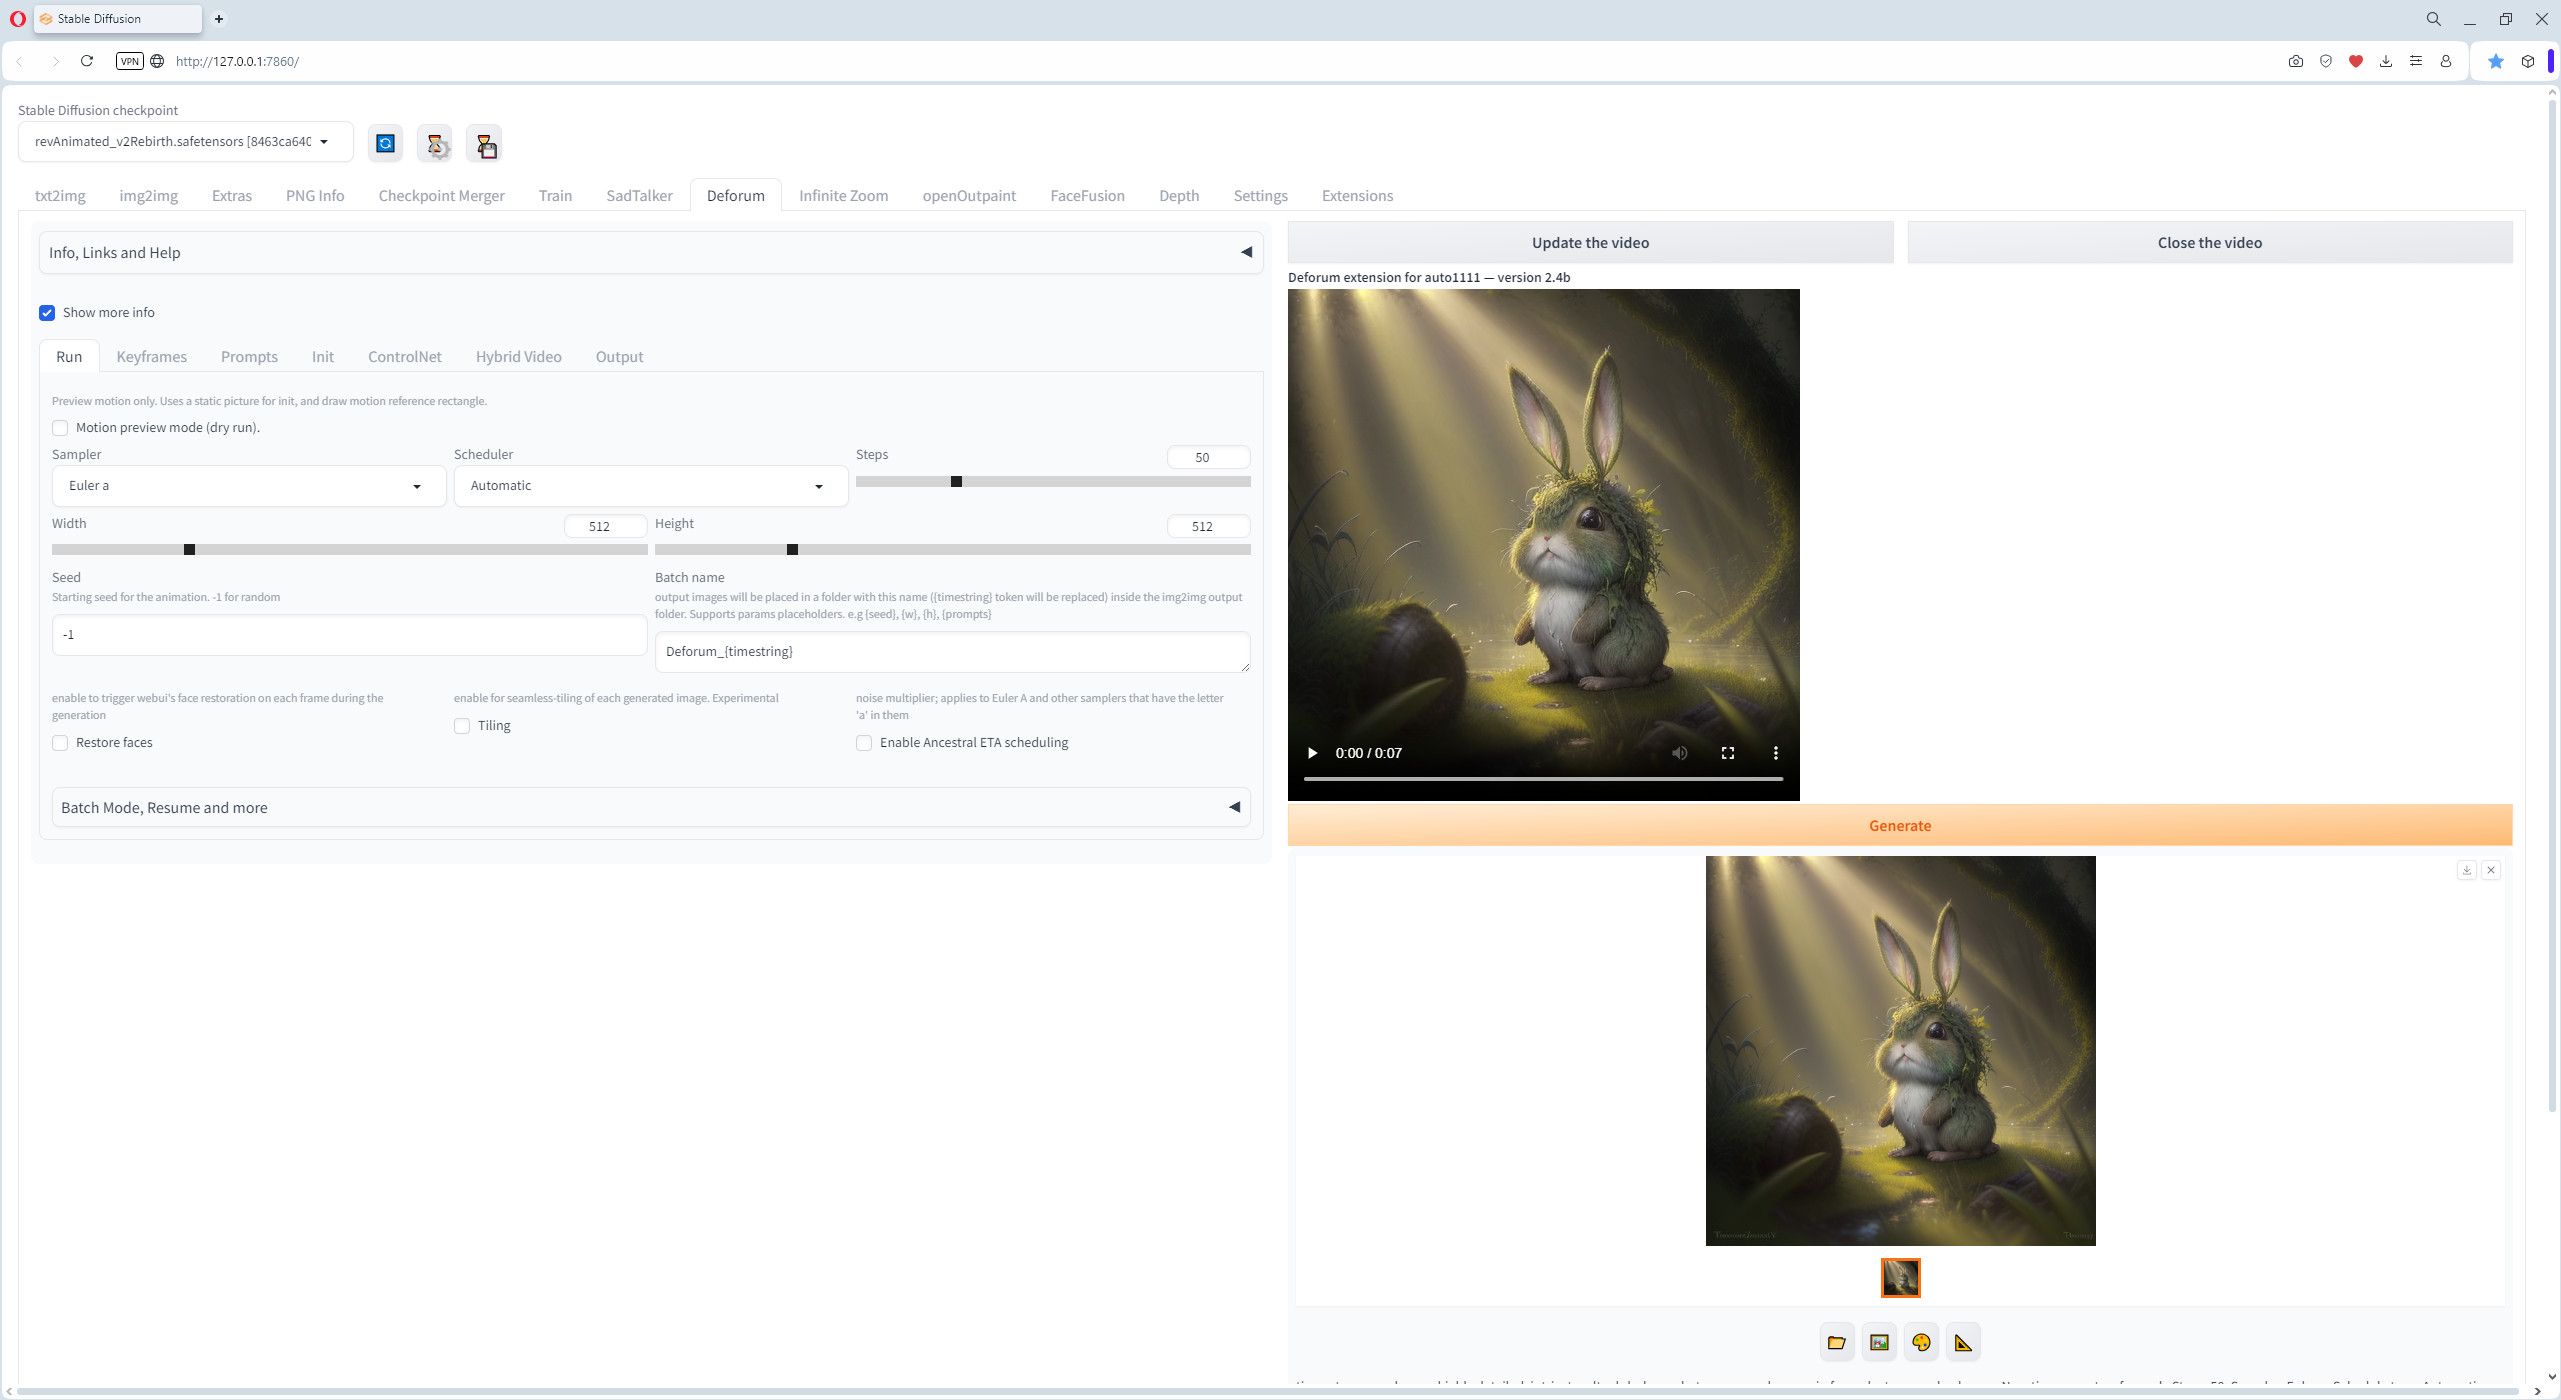
Deforum Settings
The zipfile contains four example settings files for the Deforum extension in SD WebUI from Automatic1111 – 12 kb
Overview
Generated result
Explain Video at Youtube
Upload at 26.01.2025
Howto
Load one of the example settings file. Adjust prompt. Maybe add an initial image. Generate.
Description
Deforum is an addon for Stable Diffusion. It allows seed travelling, and was one of the first ways to generate animated content with Stable Diffusion.Which i have used for quite a while before i switched to Automatic1111
In the zipfile you will find four example setting files that i have used to generate my videos.
Time
Heavily depends of the settings and the size. Multiply the time to generate a single frame with the number of frames.
Requirements
These workflows were generated with 8 gb vram back in the days. I heard rumours that it even worked with 6 gb. It is an old technique from the early days.
You need SD WebUI from Automatic1111 or ForgeUI. I have used the Automatic111 solution. ForgeUI did not exist back in the days.
https://github.com/lllyasviel/stable-diffusion-webui-forge
https://github.com/AUTOMATIC1111/stable-diffusion-webui/releases
I do NOT recommend to even try out the addon for ComfyUI. I did. And it killed my installation by messing around with the torch version. I had to start from scratch.
You need FFMpeg installed. https://www.ffmpeg.org/
And of course you need the Deforum addon, which is located here: I am not sure if this version of the addon also works in ForgeUI, but should. ForgeUI is a fork of the Automatic1111 version: https://github.com/deforum-art/sd-webui-deforum
Simple style transfer
The zipfile contains the workflow in json and png format, plus the source image that was used to create the video. 1.24 mb
Overview
Input

Generated result
Explain Video at Youtube
Upload at 21.02.2025
Howto
Load an image. Add a style to the prompt. Have fun.
Description
A comfyui workflow that converts an existing image to another style. A photo to a watercolor painting for example. It uses stable diffusion 1.5 and two controlnet instances.
Time
As long as it takes to generate an image in ComfyUI with SD 1.5 and the usual settings.
Requirements
It depends of the size of the image. But 8 Gb Vram should be enough.
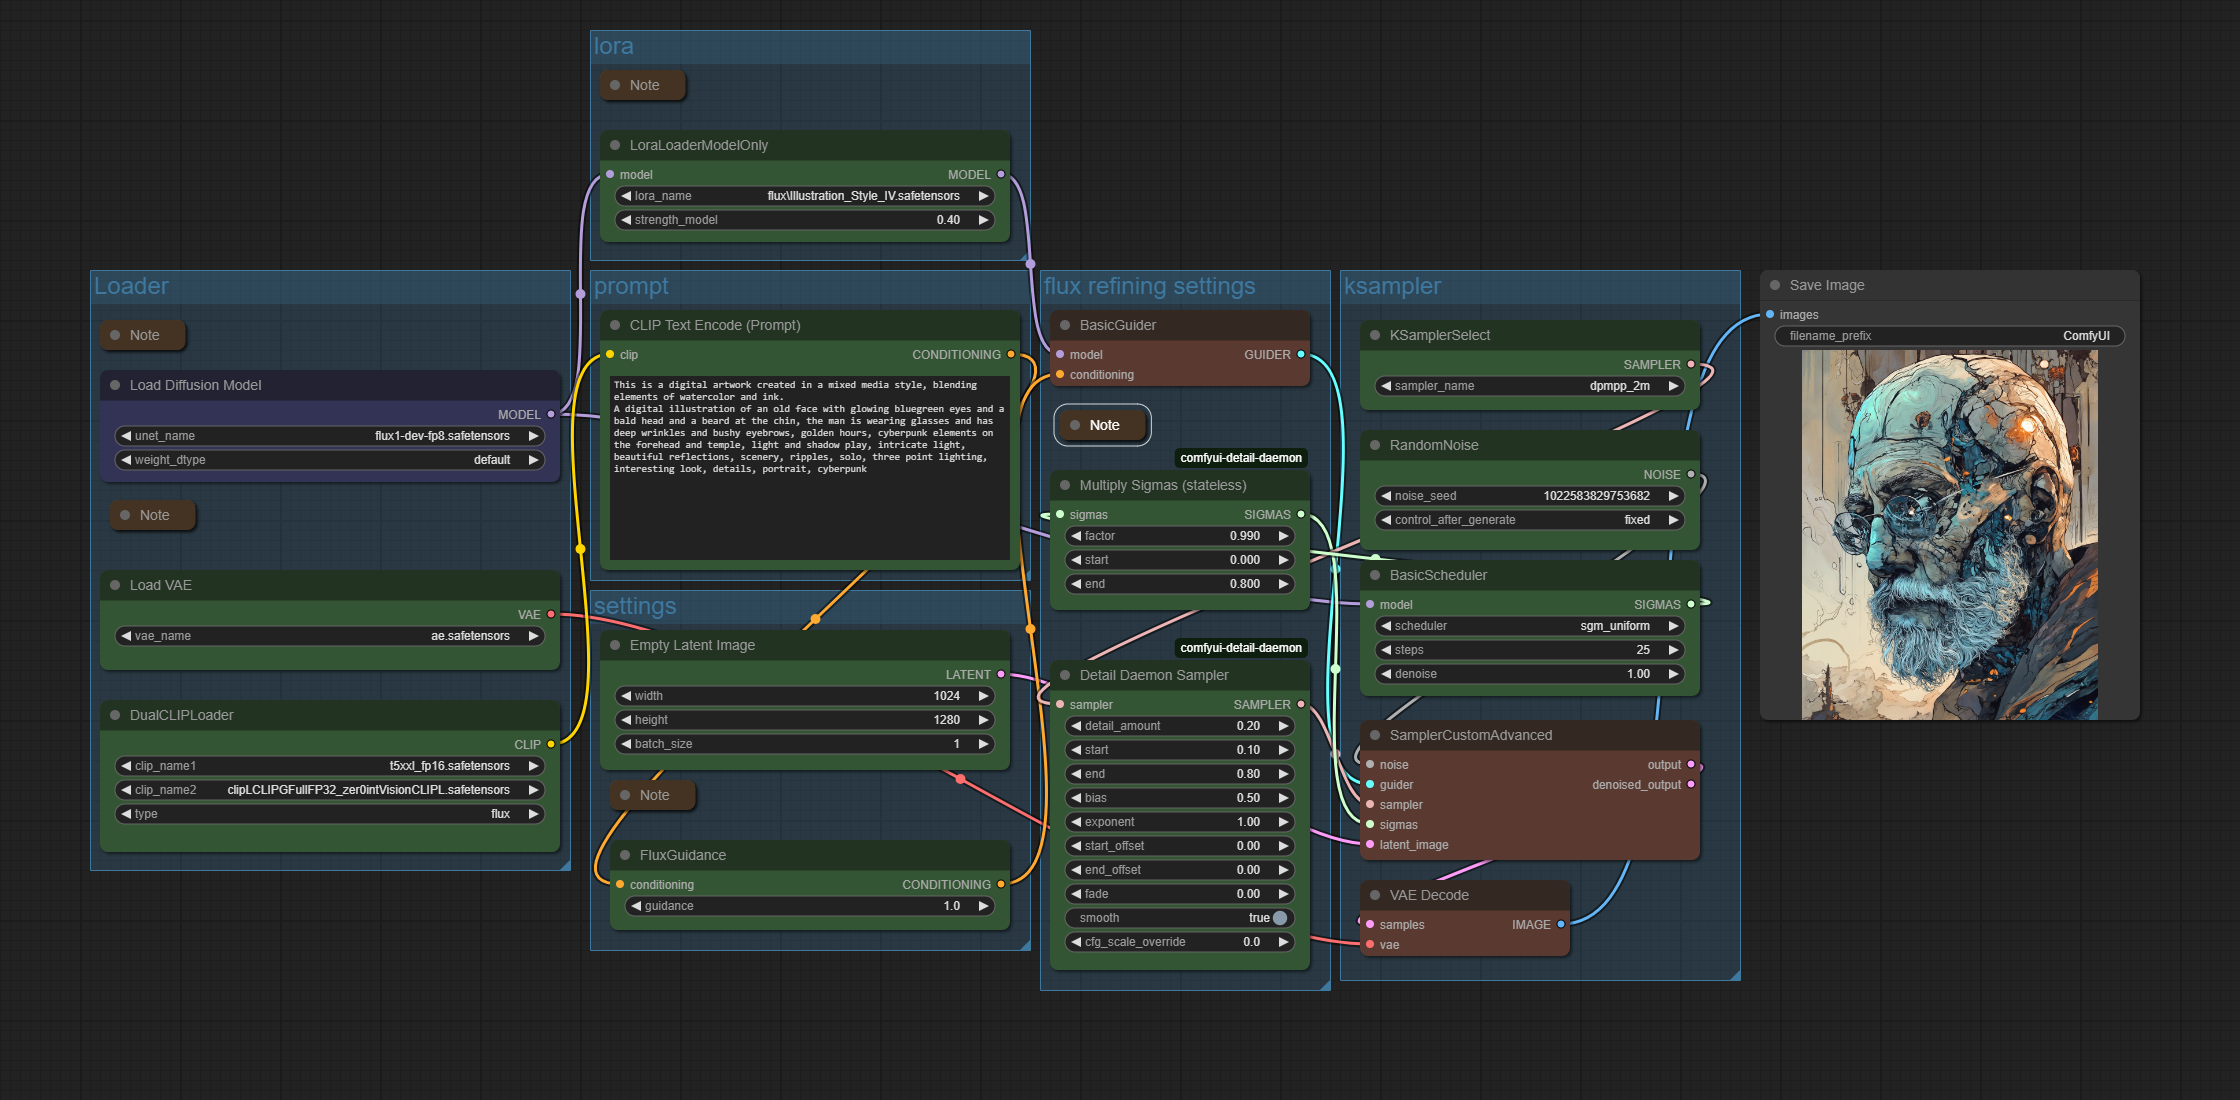
ComfyUI Flux Illustrationstyle Lora
The zipfile contains the workflow in json and png format. 660 kb
Overview
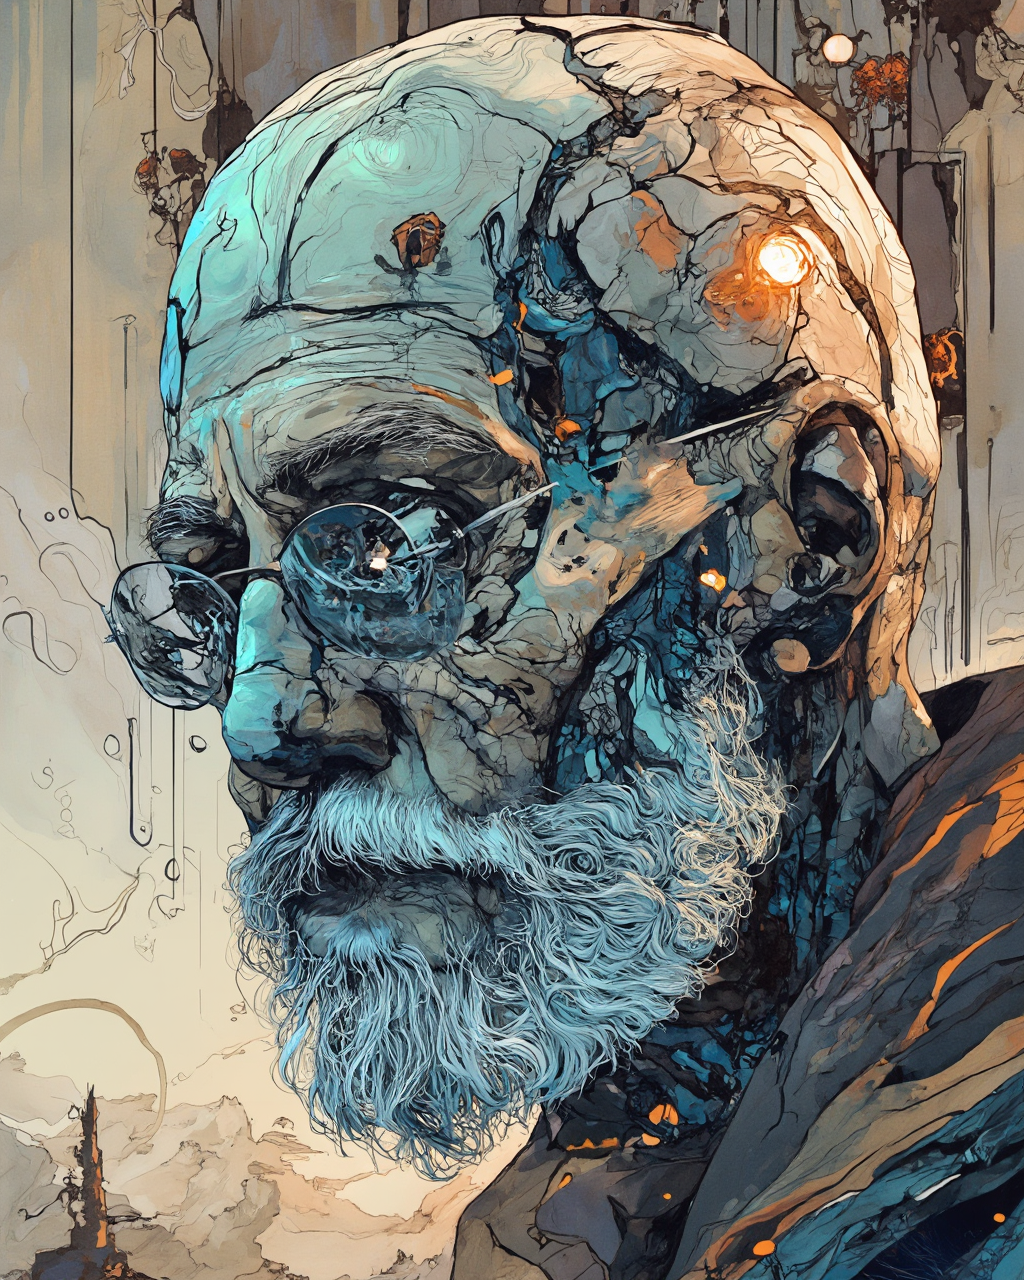
Generated result
Upload at 16.03.2025
Howto
Adjust prompt. Adjust strength of Lora.
Description
A simple comfyui flux text to image workflow with a special illustration lora. Attention, this is a flux dev workflow, not a Schnell one. Flux Schnell does not work with this lora.
The lora is located here. It is not from me. I am just a fan and a user of it. https://civitai.com/models/858800?modelVersionId=1224481
Time
As long as it takes to generate an image in ComfyUI with Flux Dev
Requirements
It depends of the size of the image. But 8 Gb Vram should be enough.